You are not logged in.
- Topics: Active | Unanswered
#26 Re: Feature Requests » Temporary Lift Control on print screen » 2016-11-08 18:05:55
The initial thought that I had is to create a single custom button on the home page that does a one-time lift when you press it:
G1 Z25 F200
[Delay 5]
G1 Z-25 F200
That said, I'm not sure when that code would be executed when you press the button.
#27 Re: Help and Support » Model placement » 2016-11-04 13:55:39
And also is there any software has support generator that I can use, it seems slic3r doesn't have this function.
Most people are using either B9's software or Meshmixer for support generation. My preference is B9's.
#28 Re: Everything else » Successful Prints » 2016-10-02 01:35:03
DLprinter: How are you liking WaxCast so far?
#29 Re: Bug Reports » NanoDLP crashes when model too large » 2016-09-12 13:39:02
asiga stomp
Awesome; thank you! ![]() Wow, those sliced models upload fast and convert fast compared to uploading a STL or SVG! I'm a convert.
Wow, those sliced models upload fast and convert fast compared to uploading a STL or SVG! I'm a convert.
#30 Re: Bug Reports » NanoDLP crashes when model too large » 2016-09-08 21:51:07
Do you have a recommendation for a SLC program for converting STLs? I seem to recall seeing a recommended one on the NanoDLP homepage, but it's gone.
#31 Bug Reports » NanoDLP crashes when model too large » 2016-09-08 13:32:01
- sgraber
- Replies: 12
I'll preface this by saying I'm running NanoDLP on a Raspberry Pi 2, which could be causing my problem to begin with, but I thought I'd check anyhow. ![]()
I have noticed that if I upload too large of a model stl (in my case a 350MB file) that this will crash my Pi when NanoDLP starts slicing it. The only way I can get my NanoDLP to come back up is to reboot, immediately shut down the NanoDLP instance, then manually remove the offending STL from printer/database/plates.json and /printer/public/. Rebooting the Pi then fixes the problem. I was curious if there is an upper limit?
#32 Re: Everything else » Successful Prints » 2016-08-22 16:45:03
sgraber wrote:Who's resin are you using?
next time be more polite if you ask some think , I'm not your father to keep your a...
I use custom mixed resin , it's calibration for DLprinter.com
it can't help you
I'm sorry? I just thought I'd ask! ![]()
#33 Re: Support Generator » Support generator feature list » 2016-08-22 16:42:20
Ditto!
#34 Re: Feature Requests » Subpixel printing 3D printing » 2016-08-10 14:40:35
Hi,
Very cool video. We already doing anti-aliasing which in practice result same effect on both vertical and horizontal slopes.
I am not sure if anti-alias could result same type of effect on the smaller details as described on the video.
Does NanoDLP have an antialiasing setting somewhere so someone can adjust it if they want?
#35 Re: Everything else » Successful Prints » 2016-08-08 19:57:50
Who's resin are you using?
#36 Re: Help and Support » Eagle files for PCB? » 2016-07-22 15:47:43
Awesome!
#37 Help and Support » Eagle files for PCB? » 2016-07-22 13:32:38
- sgraber
- Replies: 12
Hi! Is there any way you could make the Eagle PCB files available for download? I see that a photo and pdf are available on the download page (http://www.nanodlp.com/download/); however, some might want to actually get a board made at some place like OSHPark. People can recreate the PCB in Eagle based on the schematic, but if it's already available why reinvent the wheel. ![]()
#38 Re: Help and Support » Printer IP address now forwarding to NanoDLP.com? » 2016-07-18 12:54:01
Hi! FYI this was a fresh install of NanoDLP. After I left the pi sitting for a couple hours, my install of NanoDLP stopped forwarding to nanodlp.com, so I guess it fixed itself? ![]()
#39 Help and Support » Printer IP address now forwarding to NanoDLP.com? » 2016-07-18 03:37:33
- sgraber
- Replies: 3
I have my NanoDLP / Pi set with a static IP address of 192.168.1.170 on my local network and for some reason every time I input that IP address into my browser, it forwards to http://www.nanodlp.com/. Why is my internal IP address being redirected??? I have tried reassigning the Edimax MAC address to different IP's and they all end up producing the same error and I have verified this behavior in both Chrome and Edge. What is going on?
#40 Feature Requests » Beta Channel? » 2016-06-23 14:29:25
- sgraber
- Replies: 3
Here's an idea to throw out: I'd like to stay in the bleeding edge of NanoDLP releases but in order to stay up-to-date with the latest release, I have to manually install the latest beta. Is it possible to add a configuration option so that:
1) we get notification of a new beta release
2) we can click a button to upgrade to the latest beta
Thought I'd throw it out there as an idea... ![]()
#41 Re: Feature Requests » pushbullet API integration?! » 2016-06-23 14:27:12
I have to say, I'm REALLY liking the Pushbullet integration. I almost always have my cellphone on me (and I user the web interface to run the printer from my phone) and with this I no longer need to periodically check my printer to see if the print is done. ![]()
#42 Re: Feature Requests » pushbullet API integration?! » 2016-06-18 01:25:36
I can verify that this works:
curl -s "https://api.pushbullet.com/v2/pushes" -u APIKEY_GOES_HERE: -d type=note -d title="LittleRP: Print Complete!" --data-urlencode body="Your print is finished and may be removed from the build platform at this time." -X POST
See photo here: https://goo.gl/photos/fNGoahNz4rJpL5Rh6
Make sure to keep the colon at the end of your API key.
#43 Re: Help and Support » Confusing time readout... » 2016-06-08 20:32:38
Remaining 803 of 804 Mins means 803 minutes left until the print is done. The ETA in parenthesis is the Time in 24 hour format it should end (i.e. 5:16am).
#44 Re: Feature Requests » Verify Slicing Images » 2016-06-08 13:46:53
The SVG wasn't the problem. I deleted the problem plate and re-uploaded the SVG and it created the PNG files just fine the second time (I manually verified it by going through each layer image). Something apparently happened on the Pi during those four layers when they were generated. I can share it if you need it though. Please let me know.
A manual validation button would be nice! A lot of what I am doing is jewelry printing @ 25um layer heights and most rings end up generating about 1200 PNGs for the entire print. That is a lot of layers to manually check. ![]()
The two problem scenarios I found were 1) missing images and 2) corrupt images. I would imagine just checking the file size and the image dimensions would be adequate? If filesize = 0, then image is not present. If XY dimensions of the image are off, then the image somehow got corrupted.
Usually I let the SVG conversion complete before I do any printing.
Incidentally, I am running this on an old Raspberry Pi B (not even a Pi 2!) and it's running just fine! ![]()
#45 Feature Requests » Verify Slicing Images » 2016-06-07 17:19:00
- sgraber
- Replies: 6
Here's something I had happen to me last night: I sliced a ring @ 25um with Slic3r to svg. I then uploaded it to NanoDLP and it went through it's routine of creating png's out of the svg. During the process, four bad images were created: one was a garbled image that was maybe 1/5 the total height the image should have been and the other three were non-existent (meaning no image showed up for those three layers in a row during a layer preview). I did not catch this prior to printing so when NanoDLP hit those problem layers, it errored out and ended the print (it did not crash or reboot - it just indicated the print was done and ran my end gcode). This was about about 80% through a 5 hour print.
IDEA: Is there any way to add image error checking on individual layer images once it's been converted from svg to png? This would help reduce failed prints.
#46 Re: Help and Support » Layer delay math? » 2016-06-06 15:47:22
Ah-ha! Ok, that explains it! Thank you! ![]()
#47 Re: Help and Support » Layer delay math? » 2016-06-05 14:13:06
Considering priority of gcode parser logic, I believe solution which you came up with is correct. Let me know if it does not work.
Interestingly enough, using multiple brackets, parentheses, etc. doesn't work. You are only allowed one level deep. For example, this works:
G1 Z{[[LayerThickness]]-[[ZLiftDistance]]} F200
and outputs:
G1 Z-4.9 F200
However note if you add a second layer of parenthesis:
G1 Z({[[LayerThickness]]-[[ZLiftDistance]]}) F200
outputs this in Terminal:
G1 Z(0.100-5.000) F200
Based on the docs, this should output the same as the first but it doesn't.
#48 Re: Help and Support » Layer delay math? » 2016-06-02 17:23:56
Here's an idea I came up with while chatting with folks on IRC: use [[Delay x.x]] .
Would the following work in the "GCODE After Each Layer" box?
[[Delay (( [[ZLiftDistance]] / [[ZSpeed]] * 60 ) + ( [[ZLiftDistance]] / 200 * 60 ) + 2.0 ) ]]
It yields [[Delay (12 + 1.5 + 2.0)]] or [[Delay 15.5]]
Thoughts?
Or to make it a bit more readable:
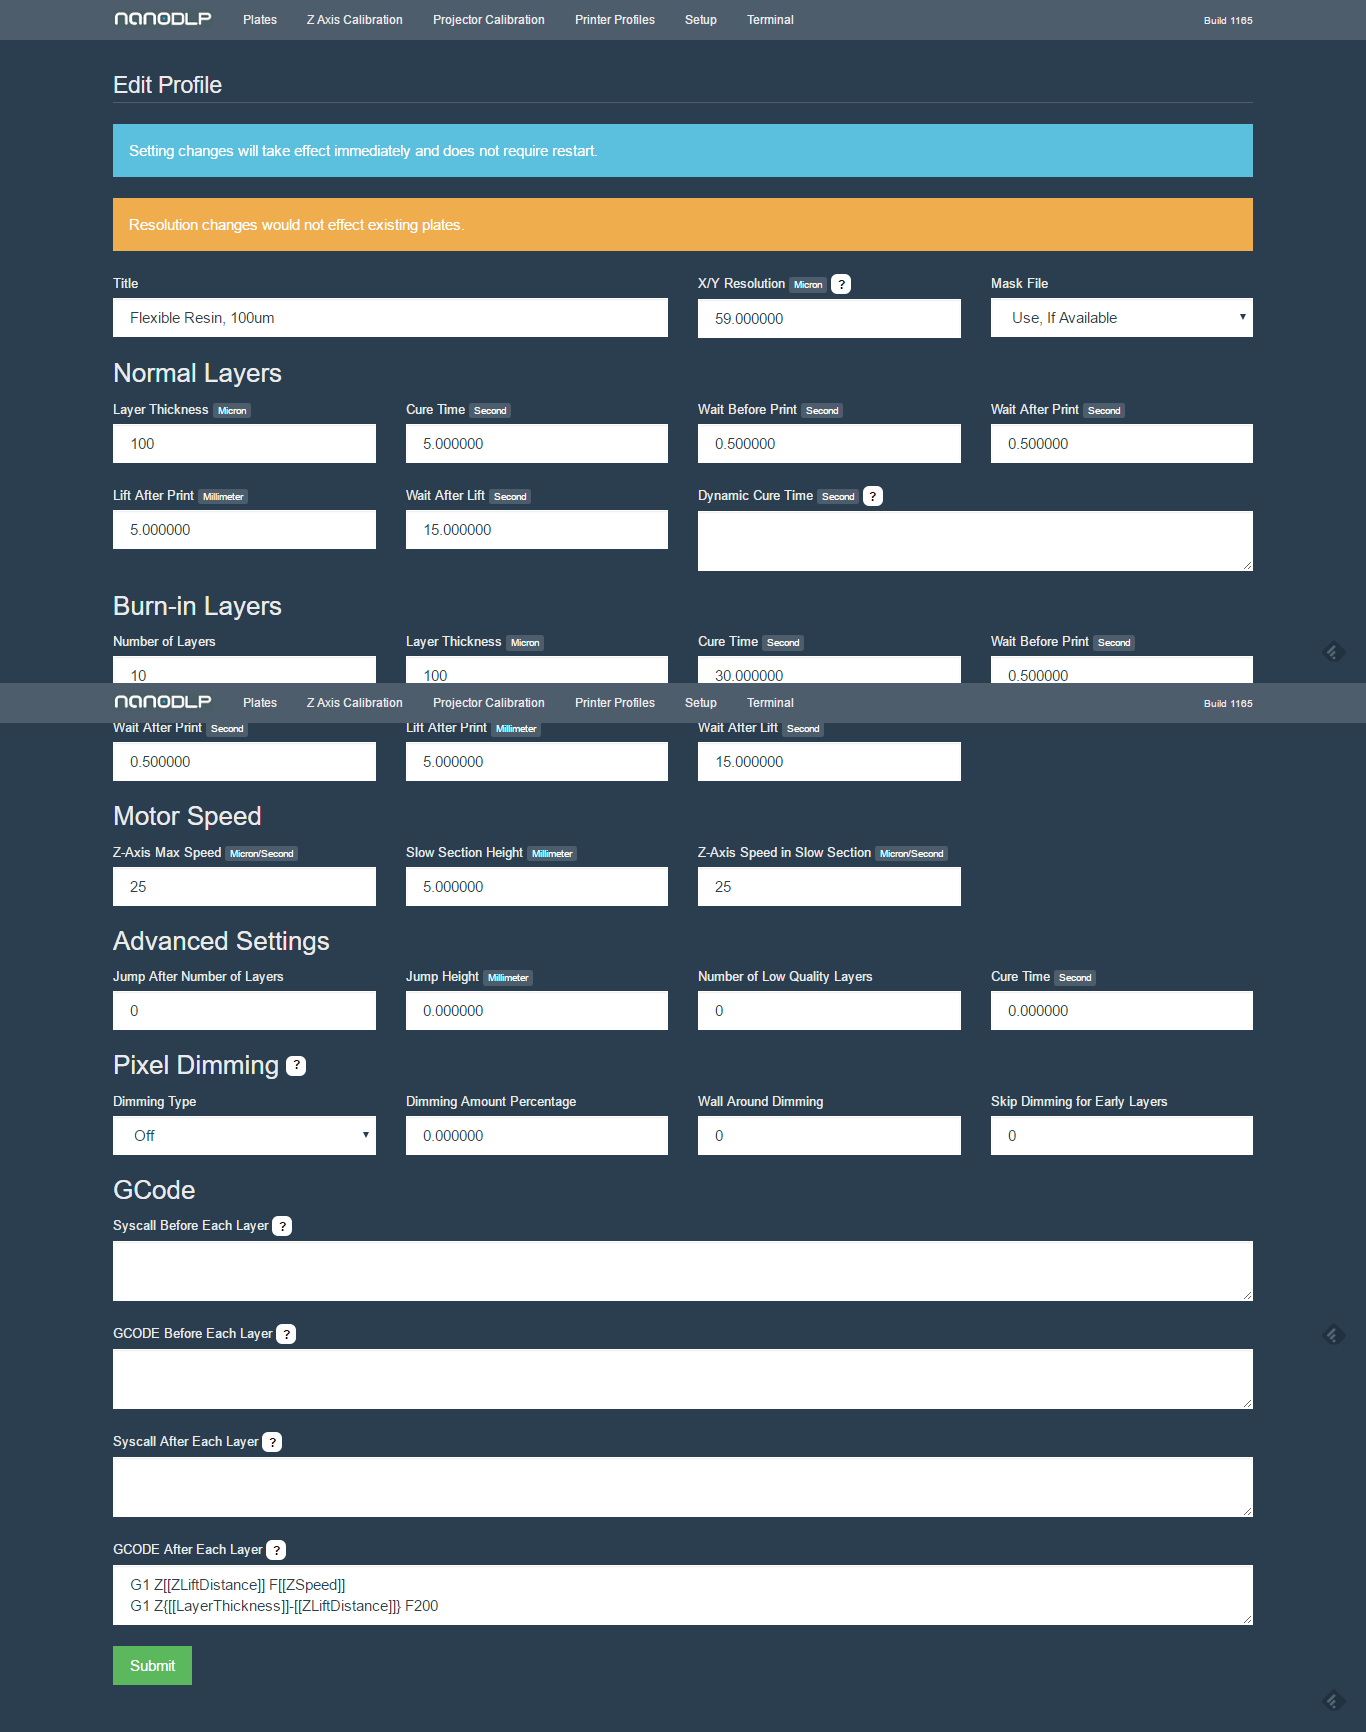
G1 Z[[ZLiftDistance]] F[[ZSpeed]]
[[Delay ( [[ZLiftDistance]] / [[ZSpeed]] * 60 ) ]] ; wait this time for z-lift movement

G1 Z{[[LayerThickness]]-[[ZLiftDistance]]} F200
[[Delay ( ( [[ZLiftDistance]] - [[LayerThickness]] ) / 200 * 60 ) ]] ; wait this time for z-return movement

[[Delay 2.0]] ; wait additional 2.0 sec to allow resin to level under build plate#49 Help and Support » Layer delay math? » 2016-06-02 06:39:02
- sgraber
- Replies: 5
Hi! I wanted to know if it is possible to somehow use NanoDLP variables for programically determining the length of time between images being displayed?
For example: I have a LittleRP with a flexvat. I have NanoDLP set to slowly pull away from my flexvat at 25mm/min to a height of 5mm, then a rapid return at 200mm/min. Programically, the blank time would be:
(5mm / 25mm/min * 60 sec/min) + (5mm / 200mm/min * 60 sec/min) = 12 sec + 1.5 sec = 13.5 sec
I then normally add about 1.5-2 sec additional time to this calculation so the resin has a bit of time to flow and level under the build platform prior to displaying the next image.
With that added,my blank time would be around 15sec.
Is it somehow possible to do this programically in NanoDLP? That way I can change either my pull speed and/or my lift height and not have to manually change the
Here is my settings and printer setup:
Profile: http://i.imgur.com/d0StqMI.png
Hardware Setup: http://i.imgur.com/UBShnMB.png
Given the variables that we can use for calculations, I have to believe this is somehow possible...I'm just not seeing it. ![]()
#50 Re: Help and Support » Webcam Support? » 2016-04-11 17:40:03
Hi Shahin:
Nope, I have not solved the nanodlp / windows 10 issue as of yet. I've been side-tracked on other projects.