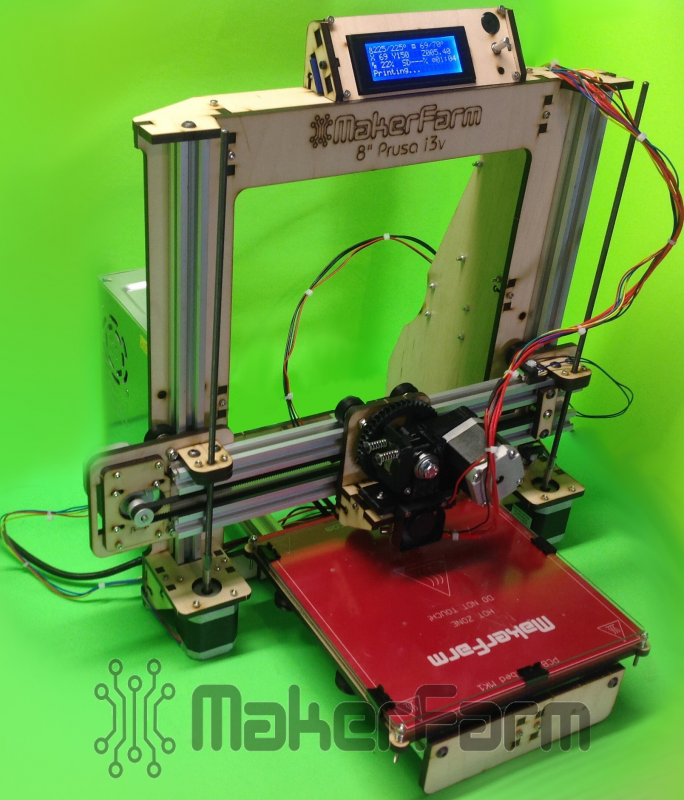
After much thinking about wanting a 3D printer and considering modifying my ShapeOko to a 3D printer I decided to find a kit for a printer. So this is to document a kit build of a 3D printer. What has this to do with OpenBuilds if it is a kit. Well when I found the MakerFarm Prusa 8" i3 kit on their site is I thought that all I had to do is order it. It did use machined rods and round bearings but it would do the job. BUT no they were out of stock. I contacted Collin the owner of MakerFarm and asked when they would be back in stock. He said in a week or so. I waited with baited breath (old fish story) for them to be in stock. On the Monday that he said they would be there low and behold this shows up on his site. The "Prusa 8" i3v" printer. And wonder of wonders it has V-slot rails and wheels as it linear mechanizism. I have these already for an CNC mill project that I am starting also. So wham out goes the money.
By the way the kit costs $650.00 at this time. All you add is a power supply (PC type one each) and glass for the build plate.

It was just right to build this type of 3D printer with these parts. If you want one go over to
http://www.makerfarm.com/index.php/3d-printer-kits/prusa-8-i3v-kit-v-slot-extrusion.html
Also if you want to know what it takes to build this. He has documented the build with on-line documentation and a video of every step of the process. The link to the documentation is on the same page as the picture and basic information. So even I can put it together. The link is the entry on the product page "i3v Build Guide" and there is a demo video under "i3v Demo Video"
Here is the contents of the box when it arrived.

After removing everything that is not a 3D printer it resulted in these items.

And after unpacking the various bag and packages I end up with this.

Now to put tab A in slot B.
After about 12 hours of work and following all the instructions/videos. I have gotten this far.

And this is what is left to deal with. Electronics installation and such.

Here is where the printer build is after about 12 hours of work. And after 22 pages of instructions and videos. Any problems that I have had are because "I" got ahead of the instructions and was absolutely sure that I knew what to do next. I have been able to recover from them but I had to think about how to fix my improvements to get back to what the instructions said. DOH!!!!

Oops - In the upper left corner of this picture is my next project to build.
And here is the scrap/things left to do pile.

Things left to do is hook up the electronics, assemble the extruder (i have 2 different ones). Well at this time it appears that there are about 10 steps left and a bunch of optional steps for different issues.
I started hooking up the electronics. Wiring does need to be cabled together. Here a some pictures of where the project build is at this time.


I went over to the hardware store to get some bolts to mount the power supply. It is the 12volt one in the OpenBuilds store. It take 4 - 4mm bolts 8mm long to mount the power supply on the left side of the printer. Also there are holes to fit the power supply bolt pattern. YAAA. I have also cleaned up most of the wiring with zip ties. All that appears to be left to do is to hookup the power lines to the Ramps control board. Then to carefully power up the system and see if any of the "Magic Blue Smoke" escapes the little black squares on the boards. (I think that the little black squares are just for decoration).


Ok - I fixed the last of my stupid mistakes and have been able to align the printer. Now to print a test piece. Here is the machine in it's finished form.

And here is the printer printing a test cube.

One last thing to do is print the replacement parts for the extruder as it is made from extruded plastic and I have all the file to recreate them.
Final update.
I have finished calibrating the machine and it runs great. Easy to put together and use. The build instructions and video's make very easy to do. Just do not get ahead of the build thinking you know what comes next. You probably guessed wrong. I did.
Here are some final pictures. First of what is left over after completing the machine.

And here are some of the parts that have been made in just 1 afternoon. The parts on each side of the calibration cube are replacement parts and the gear on the build platform is also a replacement part.

Bob
Bob's 3D Printer Kit Build
Build in 'Cartesian Style Bots' published by bobt, Apr 9, 2014.
I have wanted a 3D printer for a while. I had thought to convert my ShapeOko machine to a 3D printer BUT after looking at having to replace the electronics with new and the small form factor. I went looking for a kit which would do what I want. Well I found it. It is the MakerFarm i3v printer.
-
-
-
- Build Progress:
-
- Build Complete!
sjmaddy, mw.design, Chris Laidlaw and 2 others like this. -
-
Build Author bobt, Find all builds by bobt
-
- Loading...
-
Build Details
- Build License:
-
- CC - Attribution - CC BY
Reason for this Build
Because this kit has everything in it to have a working 3D printer when I am done. -
Parts list
Qty Part Name Part Link Comments 1 Prusa 8" i3v Printer kit http://www.makerfarm.com/index.php/3d-printer-kits/prusa-8-i... Link 1 complete kit
© XenZine Articles from Pick a Tutor

