Welcome to OpenBuilds Community

Signup today and join in on the fun!

Sign Up

Delta-Six

Discussion in '3D printers' started by Sage, Jan 26, 2014.
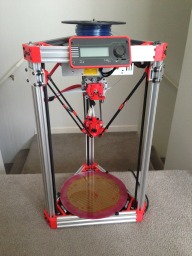
  1. Pete2014

    Pete2014 New Builder

    Hi Sage,
    Thanks for sharing your build. How are you tensioning the belts?
    Peter
  2. Sage

    Sage Well-Known Builder

    Hi Pete,
    The vertex sections are designed so that you can use M3 hardware to "pull up" the entire top triangle. So you simply loosen all the end cap screws, lower the entire top of the printer, and loop the belts. Then use long M3 screws (with washers hooked on the V-slot) to pull up the top and apply tension to the belts.

    That, or just use a pair of needle nose pliers to pull the belt tight and lock it in. I definately make sure that all my belts are exactly the same number of teeth first.

    Let me know if this doesn't make sense.
    -Sage
  3. Josh Mascote

    Josh Mascote Well-Known Builder

    Do you by chance have any pictures of the idler pulley portion? I am not sure how the idler cap fits to hold the idler.
  4. Sage

    Sage Well-Known Builder

    Sure Josh, sorry for the delay. Here is how I did the setup. Using an M5 bolt through the entire stack it looks like this:
    Bolt head: washer: idler cap: washer: bearing: spacer: pulley: nut: nut: bearing

    That is what I did, but you could do whatever works with what you have lying around. Really all you need to do is get the two bearings held in place with something for the belt to ride on. I used additional pulleys because I had them lying around, but I could have easily just used another bearing sandwiched between two large washers. Making a stack that is held in place to the idler cap (two nuts on the end) makes it easy to assemble/disassemble. Here are some photos, let me know if it doesn't make sense.

    IMG_1004.jpg IMG_1005.jpg

Share This Page