Mobile robots become much more flexible and fun when you add Bluetooth or some other form of wireless communication to them. You can control them remotely yourself, or connect them to a PC which coordinate the movement of multiple robots, or record data from their sensors.
Now, Dagu’s Adventure Bot is a very versatile robot, and has lots of cool features, but one thing it lacks is wireless control. Well we’re going to put that right, and show you how you can use a Bluetooth module, and the Arduino SoftwareSerial library to get your Dagu Adventure Bot talking wirelessly to your PC and/or your smartphone. We also provide some example code which lets you drive the Adventure Bot around using the most excellent MOBOT BT Car app.
Required Materials and Equipment
- Dagu Adventure Bot
- Bluetooth Module
- Wires with 2.54mm Female connectors
Attaching the Bluetooth Module
Now, the Bluetooth module we’re using is a UART module in the sense that you would normally attach it to the UART pins of your Arduino, and then use the Serial library to talk to it. Behind the scenes the Bluetooth connection is used to transmit data to an external device, but for all intents and purposes, your Arduino code can just pretend that it’s using a standard serial port.
Unfortunately, the UART pins on the Adventure Bot’s Atmega chip are not easily accessible, they’re only available for the USB port. You could probably attach some wires to them if you had leet soldering skills, but it’s not straightforward. So, what we’re going to do instead, is to use 2 of the pins which are exposed, in conjunction with the Arduino SoftSerial library. The SoftSerial library implements a UART module in software, and uses ‘bit-banging’ techniques so that it can communicate using almost any pair of pins on an Arduino. Now obviously, using a simulated UART is not as good as using a physical UART module because processing time is taken up performing the simulation. But any Bluetooth communication is better than no Bluetooth communication, so lets not be fussy. ![]()
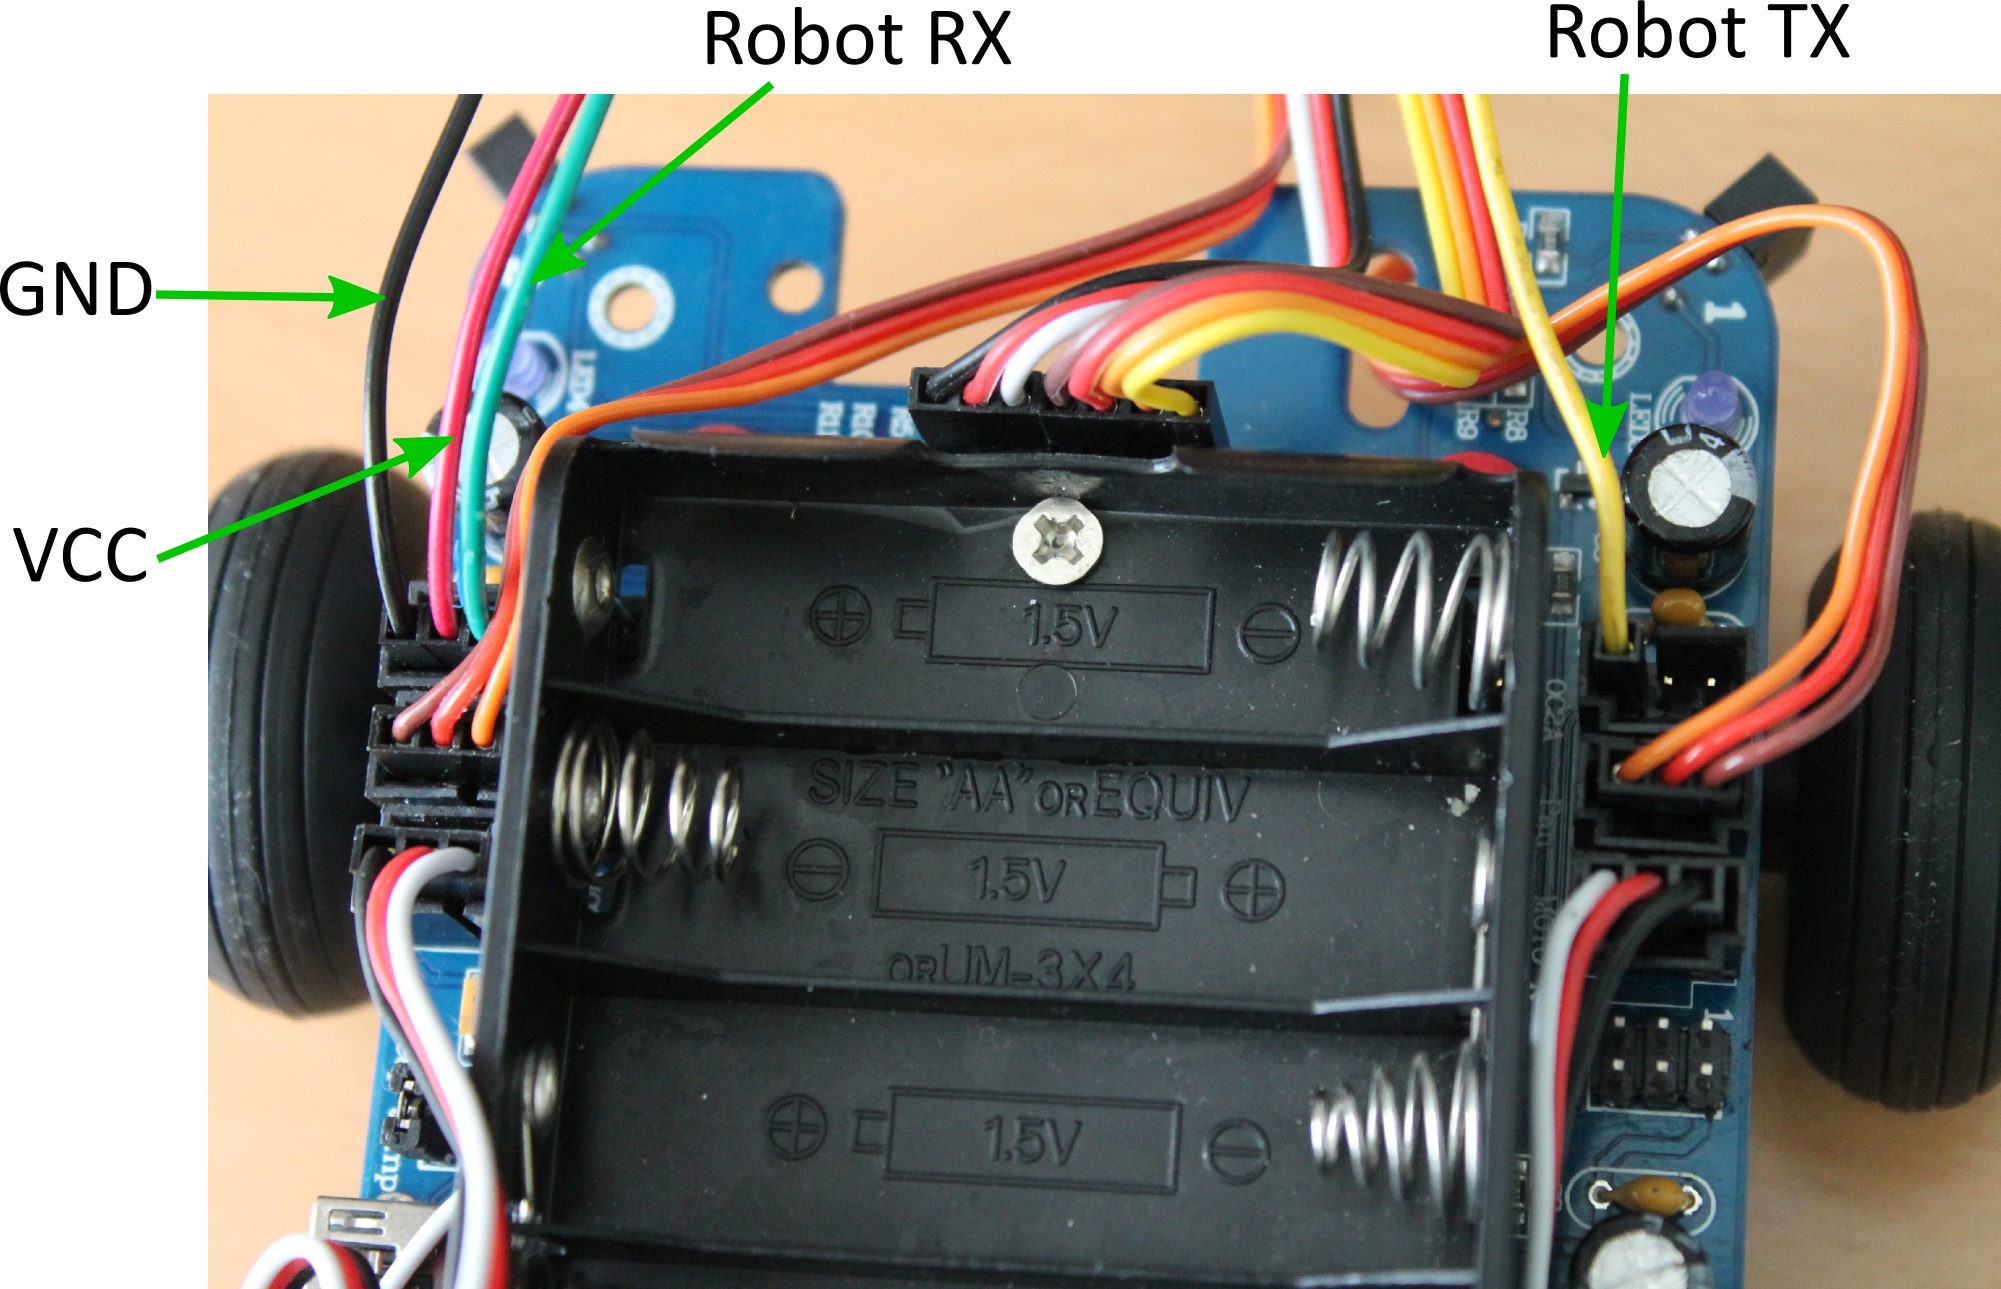
With that in mind we can attach the Bluetooth module to spare pins on the Adventure Bot. It turns out that there are 2 spare pins on the Adventure Bot, and by looking at the source for the demo program provided by Dagu, we see that the left one is digital pin 3, and the right one is digital pin 11. The connector around each pin is actually a 3 pin connector providing access to VCC and GND which we can also use to power the Bluetooth module.
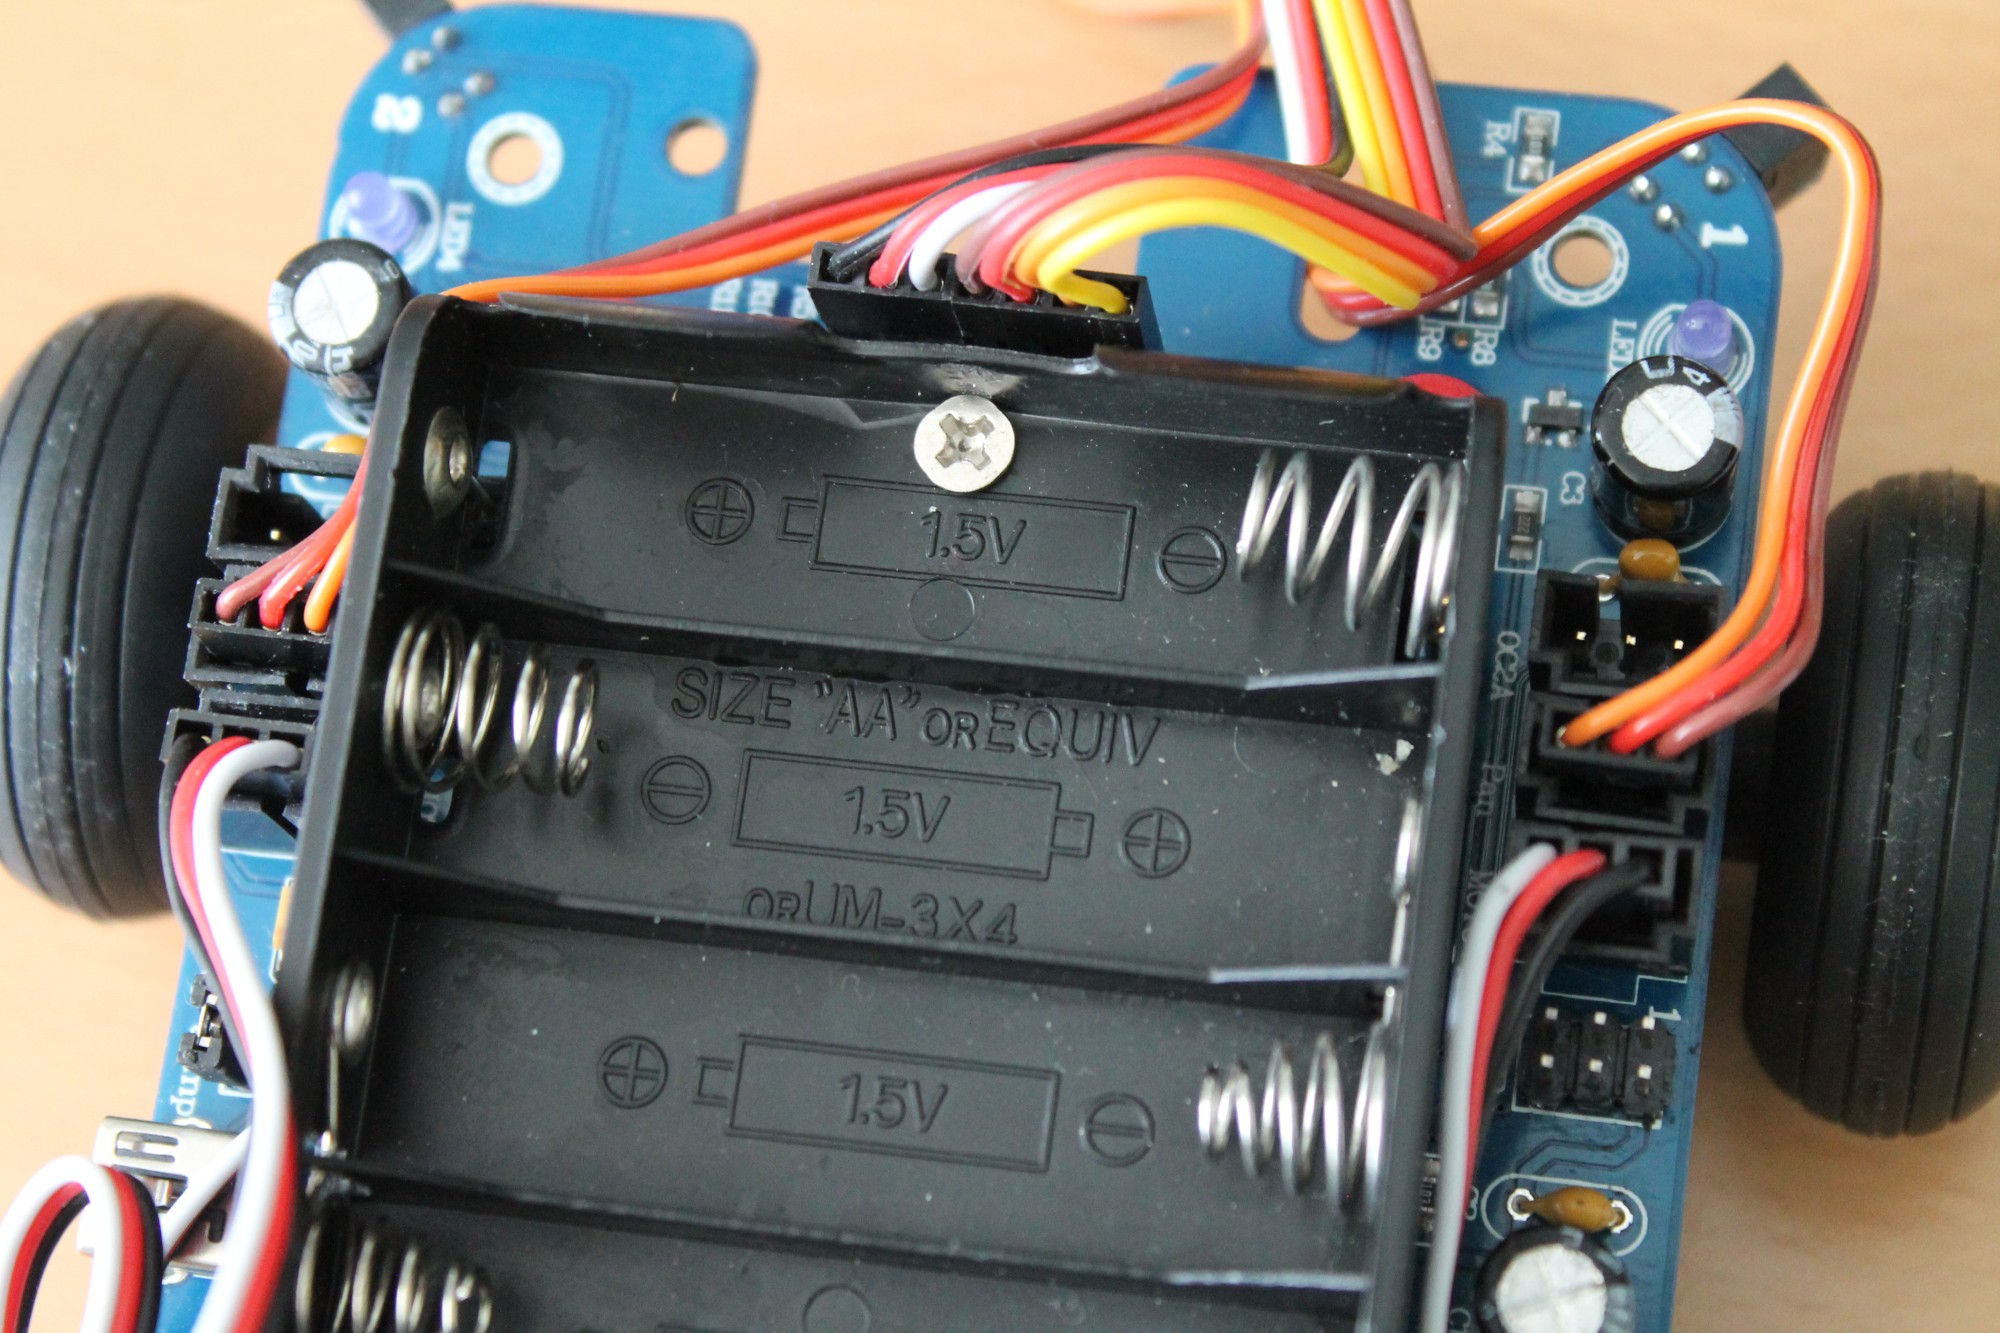
Open up your Adventure Bot using the screwdriver (instructions here if you need them) and use the wires to connect the Bluetooth module to the Adventure Bot as shown in the following images.
Robot before
Robot after
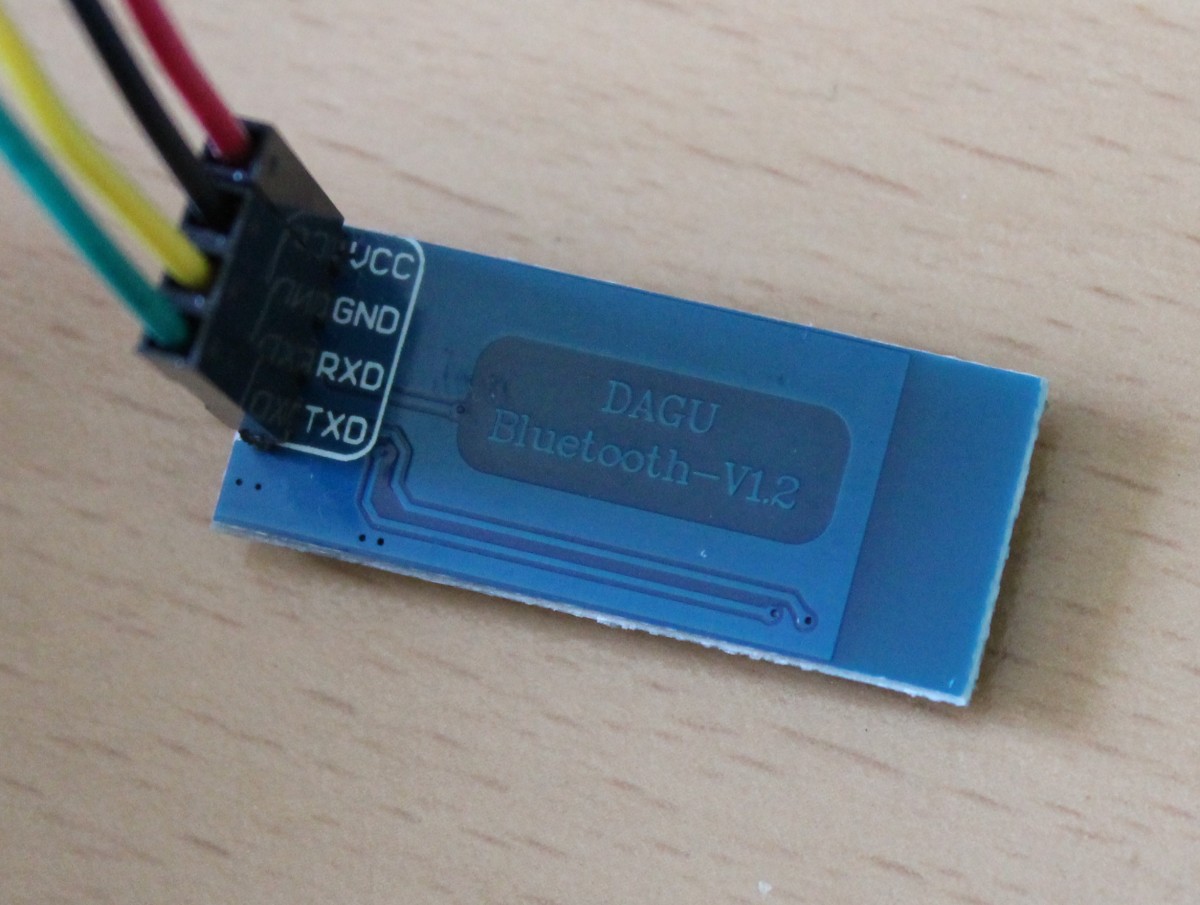
Bluetooth module wires
We have assigned the left pin (pin 3) to be the RX pin of the Adventure Bot (and so attached it to the TX pin of the Bluetooth module), and assigned the right pin (pin 11) to be the TX pin of the Adventure Bot.
Once the module is attached you should be able to turn on the Adventure Bot and see the lights of the Bluetooth module flashing. Now replace the top of the Adventure Bot leaving the Bluetooth module inside (a bit of blu-tack to hold the module in place helps here).
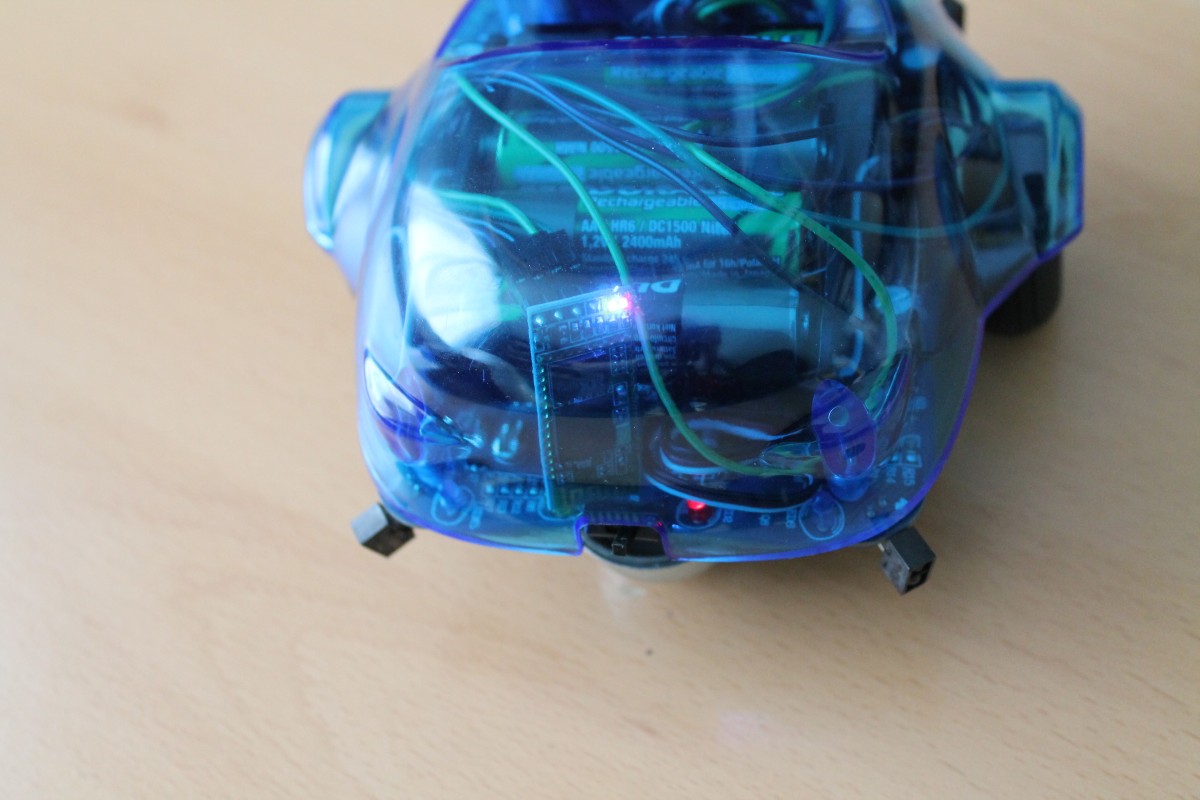
A flashing backside shows that the robot now has Bluetooth
Pairing the the Robot to a Smartphone
For the next part of the tutorial you’ll need an Android phone, and you’ll need to download and install Mobot BTCar created by Daniel Garrote Gonzalez. Go to the Bluetooth settings section on your phone and pair your phone with the Adventure Bot. If you’re using the Dagu Bluetooth module then it should be called ‘linvor’ and have a pin of 1234.
You can now connect to the Adventure Bot in the Mobot BTCar app, and when you do this, the blinking light on the Bluetooth module should go solid. Now we need to write some code for the Adventure Bot so that it can respond to the commands coming from the app!
Programming the Robot
There are quite a few Bluetooth robot control apps on the Android market place, but Mobot BTCar is one of the easiest to work with, it simply sends a stream of letters to the robot as commands.
Program the robot by starting up the Arduino IDE and setting the board type to ‘Arduino Diecimila or Duemilanove w/ ATmega168′, then upload the following code.
#include <Servo.h>
#include <SoftwareSerial.h>

//--------------------------------------------------------------------------------------------------
// Adventure Bot I/O pins
#define NECK_LEFT_RIGHT_PIN 5  // Pan  Servo             - digital output   D5
#define NECK_UP_DOWN_PIN    6  // Tilt Servo             - digital output   D6
#define LEFT_MOTOR_PIN     10  // Left  Motor Servo      - digital output   D9
#define RIGHT_MOTOR_PIN     9  // Right Motor Servo      - digital output  D10

#define RIGHT_FRONT_LED_PIN 7  // Front Right  LEDs      - digital output   D7
#define LEFT_FRONT_LED_PIN  8  // Front Left   LEDs      - digital output   D8
#define LEFT_REAR_LED_PIN  12  // Rear  Left   LEDs      - digital output  D12
#define RIGHT_REAR_LED_PIN  4  // Rear  Right  LEDs      - digital output   D4

#define RX_PIN              3  // Left  spare socket     - digital output   D3
#define TX_PIN             11  // Right spare socket     - digital output  D11

// Enums for drive and turning direction
enum eDriveDirection
{
    eDD_ForwardTurbo,
    eDD_Forward,
    eDD_Backward,
    eDD_Stopped
};

enum eTurnDirection
{
    eTD_Left,
    eTD_Right,
    eTD_None
};

// Constants
const int NECK_LR_CENTRE = 1300;
const int NECK_UD_CENTRE = 1500;
const int LEFT_MOTOR_STOP = 1490;
const int RIGHT_MOTOR_STOP = 1530;

const unsigned long NO_COMMAND_STOP_TIME_MS = 2000;    // Stop if we don't get a command
                                                       // in this many milliseconds

const int MOTOR_SPEEDS[ 4 ][ 3 ][ 2 ] =  // Drive direction, turn direction, motor (Left or Right)
{
    //     Left         Right         No Turn
    { { -100, 700 },   { -700, 100 },   { -600, 600 } },         // Forward Turbo
    { { -50, 300 },   { -300, 50 },   { -300, 300 } },         // Forward
    { { 100, -300 }, { 300, -100 }, { 300, -300 } },       // Backward
    { { 300, 300 },  { -300, -300 },  { 0, 0 } },             // Stopped
};

// Global variables
eTurnDirection gTurnDirection = eTD_None;
eDriveDirection gDriveDirection = eDD_Stopped;
boolean gbFrontLightsOn = false;
boolean gbRearLightsOn = false;
unsigned long gLastCommandTime = 0;

Servo gLeftMotor;
Servo gRightMotor;
Servo gNeckLeftRightMotor;
Servo gNeckUpDownMotor;

SoftwareSerial bluetoothSerial( RX_PIN, TX_PIN );

//--------------------------------------------------------------------------------------------------
void setup()
{
    // Initialise servos and configure pins
    gLeftMotor.attach( LEFT_MOTOR_PIN );
    gLeftMotor.writeMicroseconds( LEFT_MOTOR_STOP );
    gRightMotor.attach( RIGHT_MOTOR_PIN );
    gRightMotor.writeMicroseconds( RIGHT_MOTOR_STOP );
    gNeckLeftRightMotor.attach( NECK_LEFT_RIGHT_PIN );
    gNeckLeftRightMotor.writeMicroseconds( NECK_LR_CENTRE );
    gNeckUpDownMotor.attach( NECK_UP_DOWN_PIN );
    gNeckUpDownMotor.writeMicroseconds( NECK_UD_CENTRE );

    pinMode( LEFT_FRONT_LED_PIN, OUTPUT );
    pinMode( LEFT_REAR_LED_PIN, OUTPUT );
    pinMode( RIGHT_REAR_LED_PIN, OUTPUT );
    pinMode( RIGHT_FRONT_LED_PIN, OUTPUT );

    // Initialise serial communication for bluetooth at 9600 bits per second
    bluetoothSerial.begin( 9600 );
}

//--------------------------------------------------------------------------------------------------
void loop()
{
    unsigned long curTime = millis();

    // Update the software state in response to serial commands
    if ( bluetoothSerial.available() )
    {
        char command = bluetoothSerial.read();
        boolean bGotCommand = true;

        if ( 'f' == command )    // Forward
        {
            gDriveDirection = eDD_Forward;
        }
        else if ( 'b' == command ) // Backward
        {
            gDriveDirection = eDD_Backward;
        }
        else if ( 't' == command ) // Turbo
        {
            gDriveDirection = eDD_ForwardTurbo;
        }
        else if ( 'z' == command || 'y' == command || 'x' == command ) // Stop forward, backward or turbo
        {
            gDriveDirection = eDD_Stopped;
        }
        else if ( 'l' == command ) // Go right    // Note: Not a bug, just how MOBOT BTCar is
        {                                         // setup by default
            gTurnDirection = eTD_Right;
        }
        else if ( 'r' == command ) // Go left
        {
            gTurnDirection = eTD_Left;
        }
        else if ( 'v' == command ) // Stop turn
        {
            gTurnDirection = eTD_None;
        }
        else if ( 's' == command ) // Full stop
        {
            gTurnDirection = eTD_None;
            gDriveDirection = eDD_Stopped;
        }
        else if ( 'a' == command ) // Front lights on
        {
            gbFrontLightsOn = true;
        }
        else if ( 'c' == command ) // Front lights off
        {
            gbFrontLightsOn = false;
        }
        else if ( 'd' == command ) // Rear lights on
        {
            gbRearLightsOn = true;
        }
        else if ( 'e' == command ) // Rear lights off
        {
            gbRearLightsOn = false;
        }
        else
        {
            // Unrecognised command
            bGotCommand = false;
        }

        if ( bGotCommand )
        {
            gLastCommandTime = curTime;
        }
    }

    // Stop the robot if we don't get a command for a while
    if ( curTime - gLastCommandTime > NO_COMMAND_STOP_TIME_MS )
    {
        gTurnDirection = eTD_None;
        gDriveDirection = eDD_Stopped;
    }

    // Calculate the motor speeds and set them
    int leftMotorSpeed = LEFT_MOTOR_STOP + MOTOR_SPEEDS[ gDriveDirection ][ gTurnDirection ][ 0 ];
    int rightMotorSpeed = RIGHT_MOTOR_STOP + MOTOR_SPEEDS[ gDriveDirection ][ gTurnDirection ][ 1 ];

    gLeftMotor.writeMicroseconds( leftMotorSpeed );
    gRightMotor.writeMicroseconds( rightMotorSpeed );

    // Turn LEDs on or off
    digitalWrite( LEFT_FRONT_LED_PIN, gbFrontLightsOn );
    digitalWrite( RIGHT_FRONT_LED_PIN, gbFrontLightsOn );
    digitalWrite( LEFT_REAR_LED_PIN, gbRearLightsOn );
    digitalWrite( RIGHT_REAR_LED_PIN, gbRearLightsOn );
}
Robot Behaviour
Now when the you connect the Mobot BTCar app you should find that you can turn the robot by tilting your phone left and right. You can also drive the robot forwards and backwards, and turn the lights on and off.
Taking Things Further
The sky’s the limit really once you’ve got wireless communication for your robot. One of the really big advantages of having wireless communication on a robot is that you have access to the much more powerful computing resources of a PC. You could use the PC to record data from the robot’s sensors, and possibly even build a map as the robot moves around its environment.
How to send data from a PC by bluetooth to the serial port. Is there any port com emulator? I understand very well the part to program in the arduino board, but what I have to do in the PC part?
It depends on which operating system you’re using i.e. Windows, Linux etc. I left setting up a PC bluetooth connection out of the tutorial, as it’s the kind of thing that requires a tutorial all on its own.
With that in mind, I followed this tutorial here to setup bluetooth as a serial port on Linux (will maybe also work on OS X), and I believe that this tutorial from Sparkfun will work for setting the device up on Windows.
Now, once you have a serial port setup on your operating system, you can perform the communication using your favourite terminal emulation program such as Hyperterminal or RealTerm for Windows, or Cutecom for Linux. If you want to do the communication programmaticaly then again you’ve got a load of options, my personal favourite is to use Python and PySerial.
Anyway, I hope that helps. I got the impression from your question, that setting up the serial port was the main thing you had an issue with, but if you need any more pointers for communication on the PC side, just let me know.
Regards
Alan
Yes you anwser very well to my question!!
I will read this tuto to setup bluetooth as a serial port on my windows. An after I will use a serial lib in C++.
Thanks!
Glad to help. Let us know how you get on. We’d be very interested to see what you’re working on. You could even post about it in our forums. It’s a bit quiet in there at the moment, so you’d have the honour of being amongst the first.
Was wondering how I change the name for the module, linvor is fine but does not suit my robot. Read a few articles mentioning AT commands but can’t find any information on this bluetooth device. Apart from that its fantastic
Hi Jess,
I haven’t tried these myself, but I think that the commands given here should do what you want. I think that the commands are sent with a serial write, you then wait a bit and should receive a response.
Let me know how you get on.
Regards
Alan