
OSH Park
Profile for BananaGuns
Shared projects
16mm LED Button.zip
by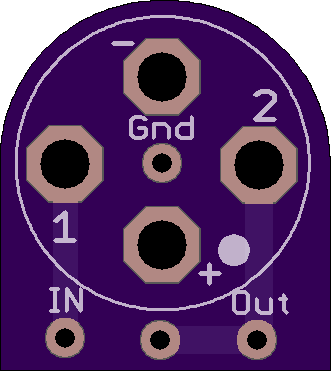
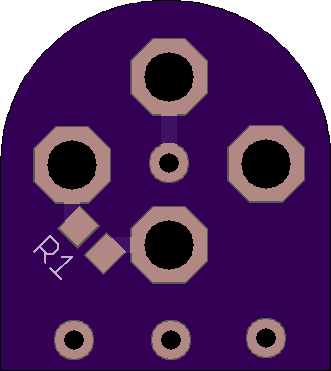
2
layer board of
0.66x0.74
inches
(16.79x18.80
mm).
Shared on
November 7th, 2016 21:40.
Very simple breakout board for 16mm 4 terminal(solder lugs not screws) LED momentary buttons.
Have you grown tired of soldering through hole resistors to the terminals of your buttons, then soldering wires on top, which makes it impossible to heat shrink so they always come out looking sloppy -_- Well fret not! Simply solder the required 220 Ohm(adjust if necessary) 0805 resistor to the PCB, then simply connect the ground, in, and out wires(you can also connect the voltmeter positive to the extra pad if you’d like it to turn on when you press the button), then lay the PCB on the button with the resistor side facing the button, and solder in place. That’s all there is to it!
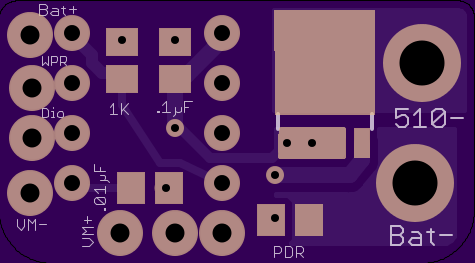
LMC555
by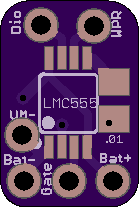
2
layer board of
0.28x0.41
inches
(7.06x10.52
mm).
Shared on
August 7th, 2016 15:49.
Very very tiny full 555 PWM circuit using a CMOS 555 timer.
| Part | Package |
|---|---|
| LMC555 | VSSOP8 |
| 1k res | 0805 |
| .1uf cap | 0805 |
| .01uf cap | 0805 |
Off board - use my 93PRxxx Diode Pot Board with a BAT54S SOT-23 diode coupled with a 10-100k potentiometer (93PR10KLF recommended). And a MOSFET of your choice!
Be sure to follow me on Instagram:
@ApexBoxMods
And check out My eBay store for completed boards!
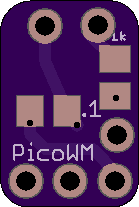
PWM Pot with BAT54S Diode
by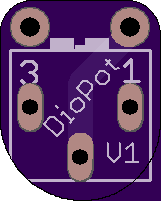
2
layer board of
0.32x0.40
inches
(8.15x10.16
mm).
Shared on
August 7th, 2016 15:49.
Clean up your PWM builds by fitting the diodes right to the back of the pot. This also reduced the depth of the pot/diodeassemnly to about ¼ the size it is with the pins and diodes normally.
You don’t need to use a ½" potentiometer, pretty much any pot with a staggered footprint (shaped like a triangle) will work.
| Part | Package |
|---|---|
| 93PR10KLF | VSSOP8 |
| BAT54S | SOT23 |
Off board - One wire connects to the diode pad on your PWM board, the other connects to the Wiper pad. If the output is full power on 0, simply flip the wired around on the PWM board.
Be sure to follow me on Instagram:
@ApexBoxMods
And check out My eBay store for completed boards!
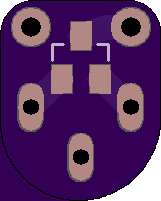
Double Sided Parallel LED PCB
by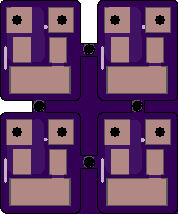
2
layer board of
0.36x0.43
inches
(9.04x10.85
mm).
Shared on
July 29th, 2016 15:55.
two 0805 LEDs in parallel with 0805 resistor
ChimPWM - MonkeyTokes Tiny
by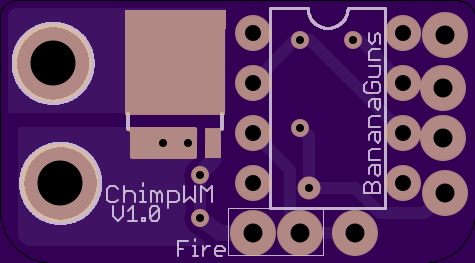
2
layer board of
0.95x0.53
inches
(24.16x13.36
mm).
Shared on
January 25th, 2016 17:14.
Combination of my Tiny PWM and MonkeyTokes PCBs for a slightly smaller DIP-8 based, dual mosfet, 555 PWM PCB