
OSH Park
Profile for dewhisna
Shared projects
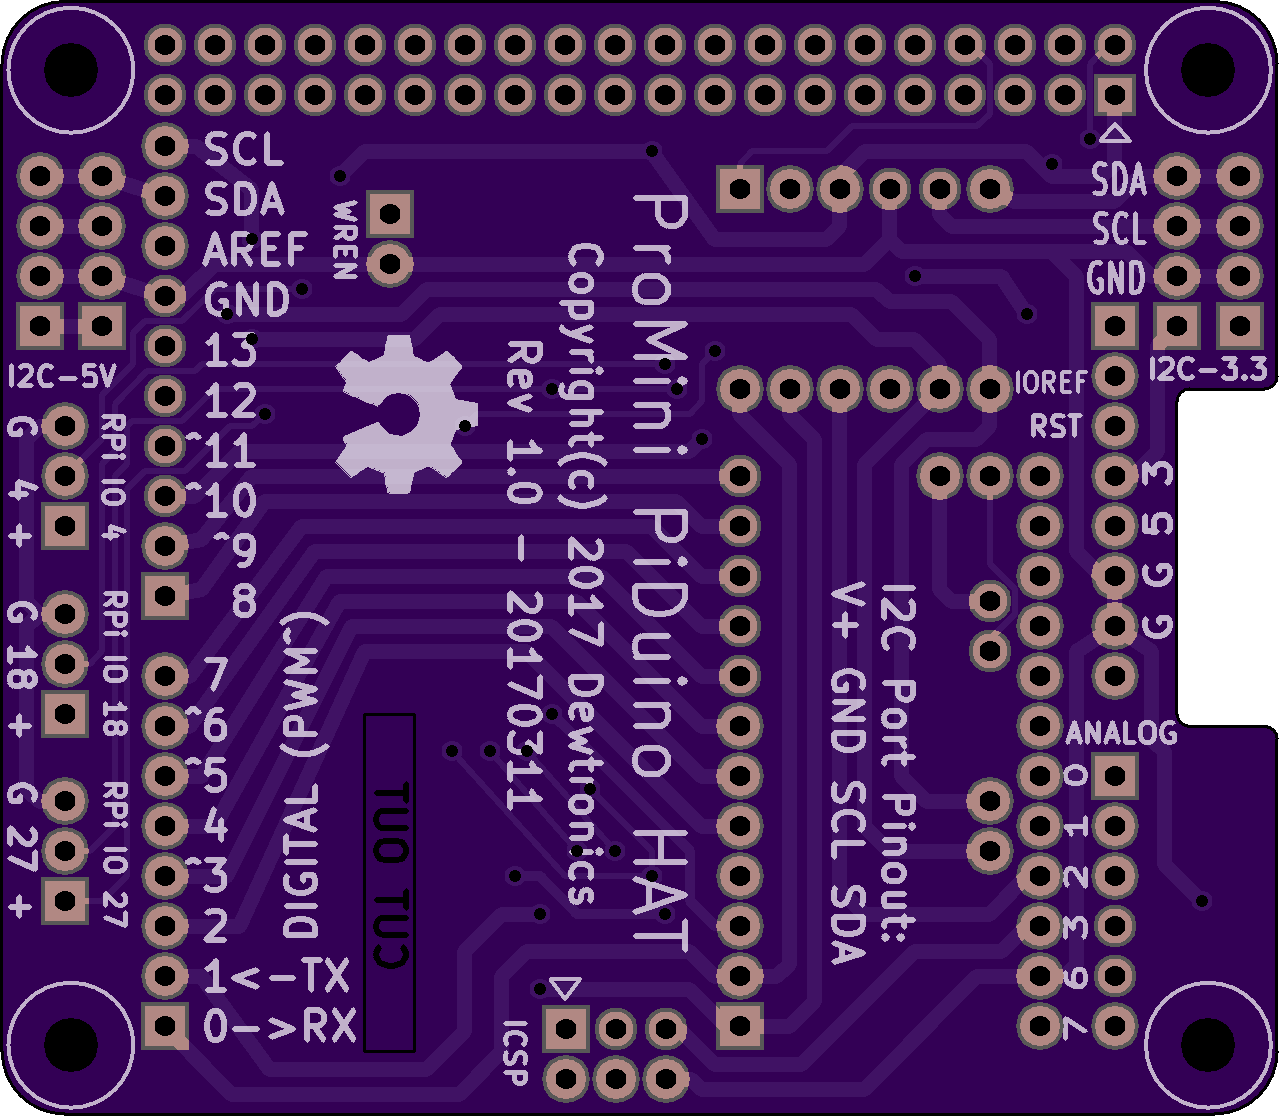
ProMini PiDuino HAT
by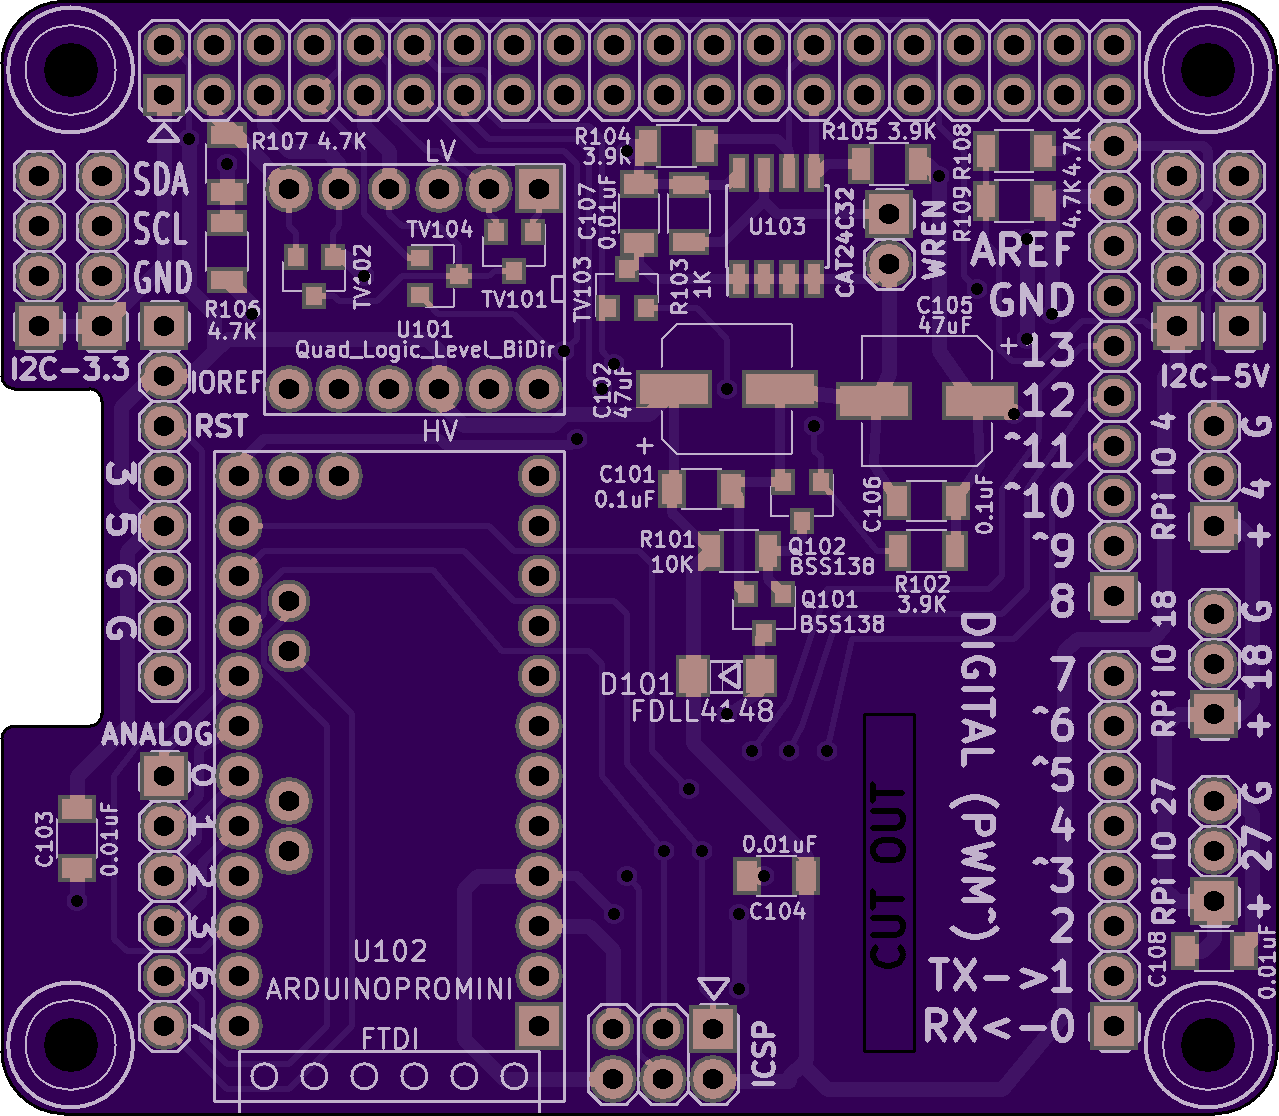
2
layer board of
2.56x2.23
inches
(64.92x56.67
mm).
Shared on
March 14th, 2017 04:15.
The ProMini PiDuino HAT Board for the Raspberry Pi 3 allows mounting of an Arduino ProMini to a Raspberry Pi as a HAT. Functionally, this board is similar to an Alamode board but without real-time clocks, GPS interfaces, and servo breakouts that aren’t needed for most projects and it’s designed to actually fit the Pi without having to insulate things to keep it from shorting out.
The primary use is to breakout connections for I2C, both 3.3V and 5V ready, and tie the ATmega328 of the ProMini to the Pi as a coprocessor for real-time I/O processing without needing a real-time kernel on the RPi.
The ProMini can interface either via asynchronous serial or as an I2C-slave. The ProMini reset can be driven via GPIO17, allowing full Arduino programming of the ProMini directly from the RPi Host.
Three RPi GPIO’s are also broken out to direct-connect ports for use with interfacing things like single-wire hygrometers. And all GPIOs from the RPi that are used for I/O by this board are ESD protected.
It has a standard Arduino Uno R3 shield connector footprint for add-on boards.
It also supports the ID EEPROM as per HAT spec, but will work on older 26-pin RPi platforms too, sans the ID EEPROM.
The ProMini board was chosen because it’s actually more price effective than manually mounting the equivalent circuitry directly to this board. It also uses the off-the-shelf quad bi-directional logic-level converter, designed to stack above the ESD protection diodes that are mounted to this board, allowing a multilayer part configuration while keeping all parts top-side.
Happy Pi Day!
FlashForge LCD/SDCard/Keypad Interface
by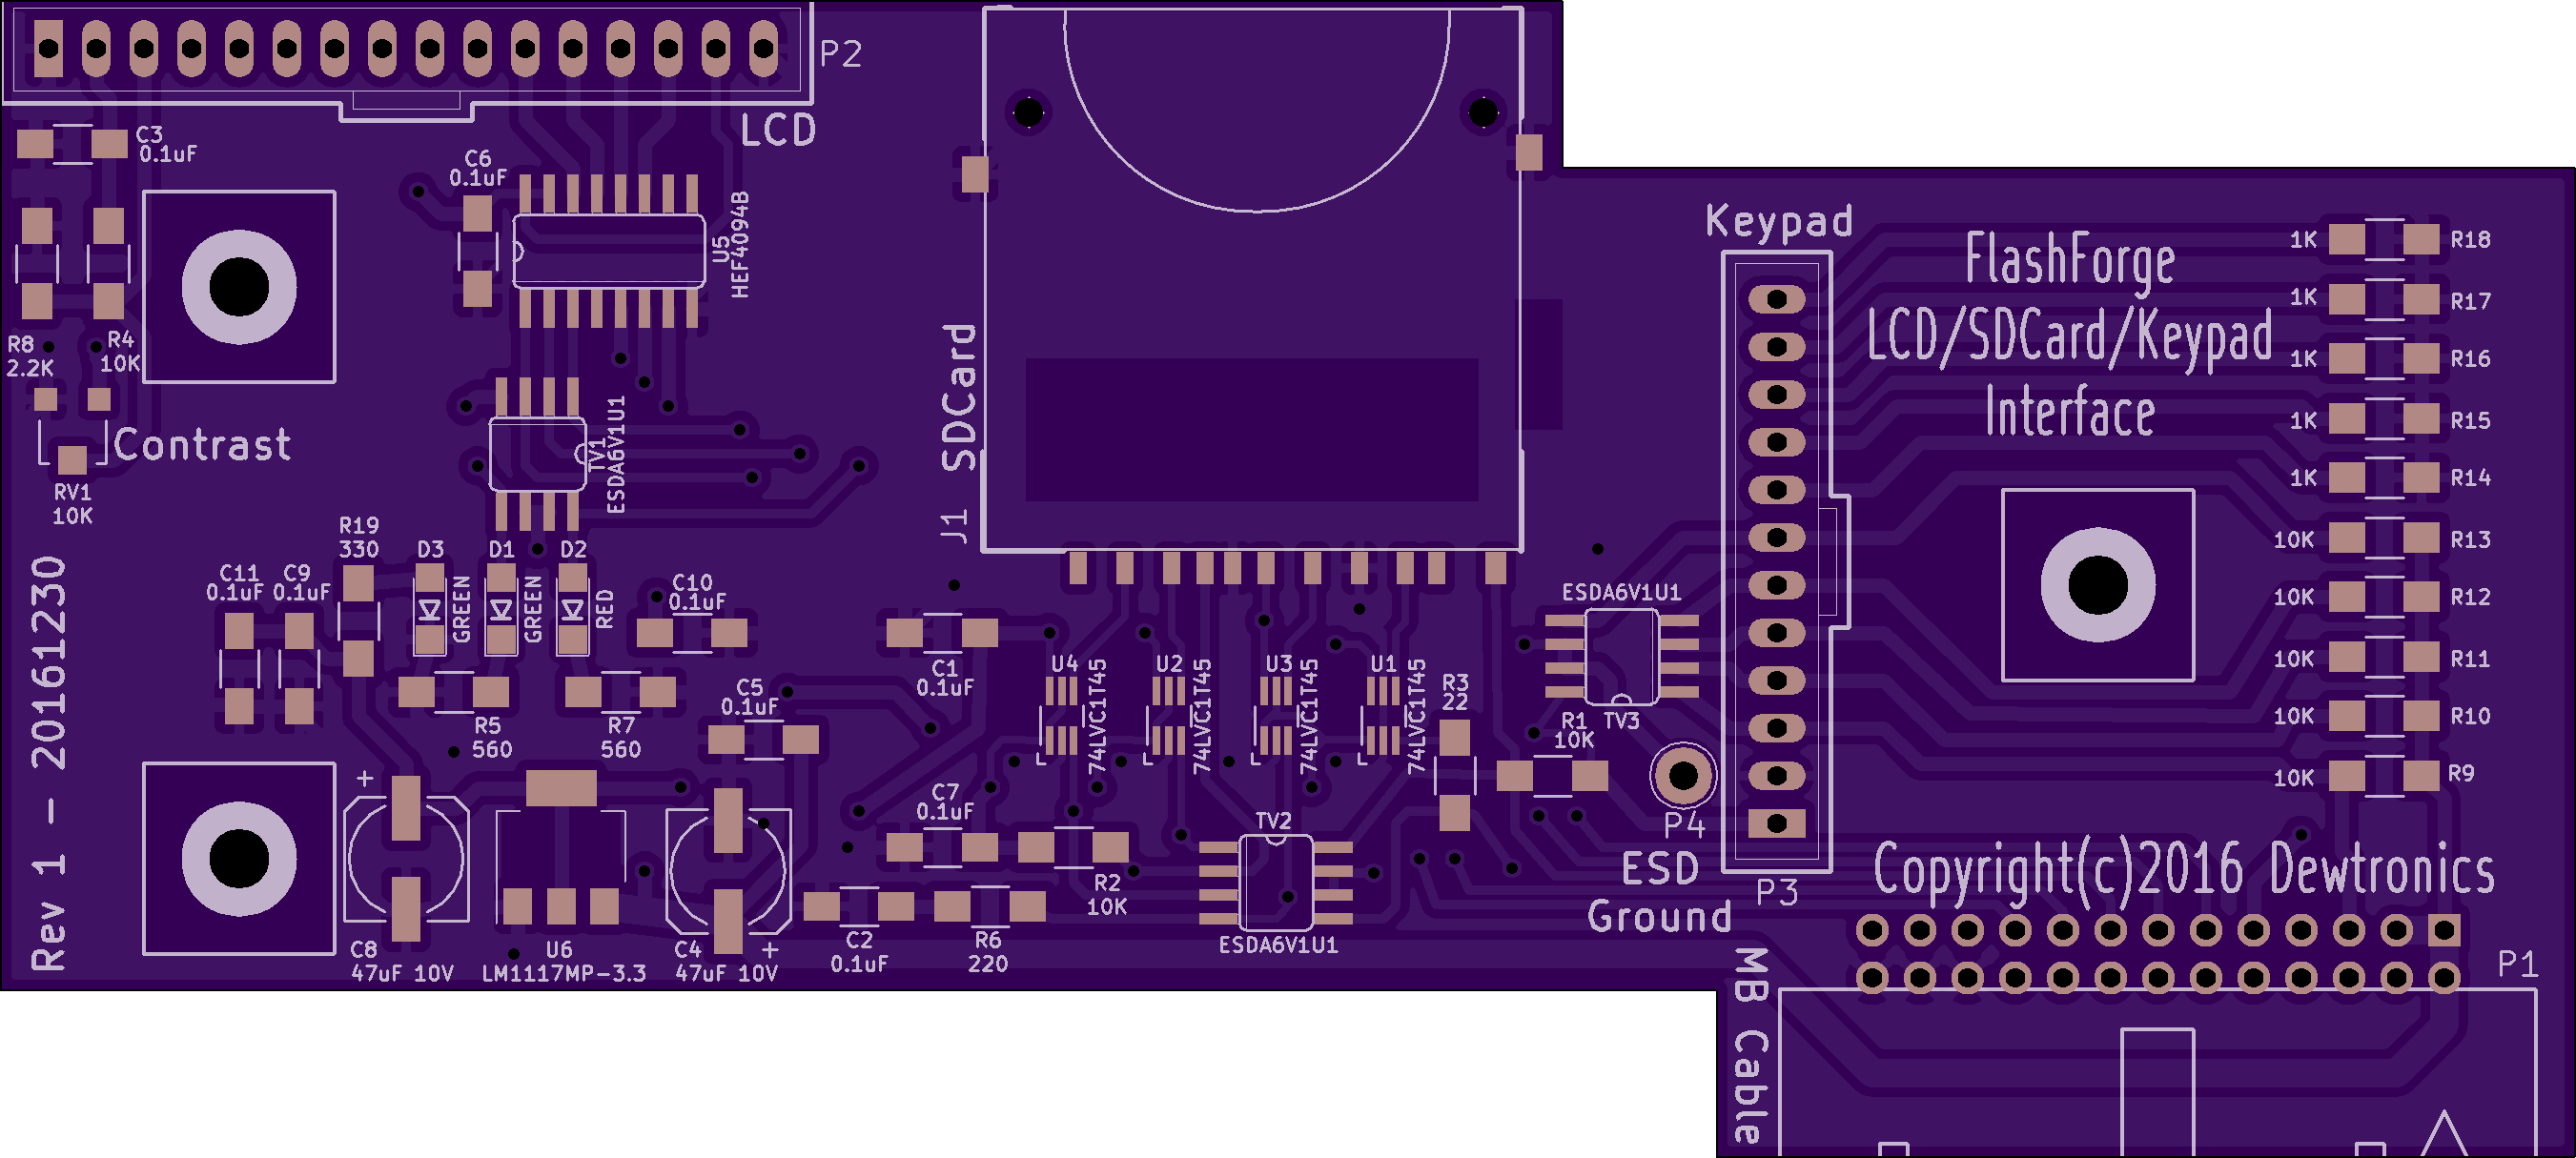
2
layer board of
5.40x2.43
inches
(137.26x61.70
mm).
Shared on
December 30th, 2016 21:39.
This is a much improved LCD/SDCard/Keypad Interface board for the FlashForge Creator Pro 2016 (and similar) 3D Printers. It offers on-board voltage regulation, ESD Protection, proper voltage level translation, power supply decoupling, and most importantly a buffer for the MISO data line. The goal is to put an end to SDCard read problems.
The Bill-of-Materials, Schematic, and additional details are available on Thingiverse: https://www.thingiverse.com/thing:2007070.
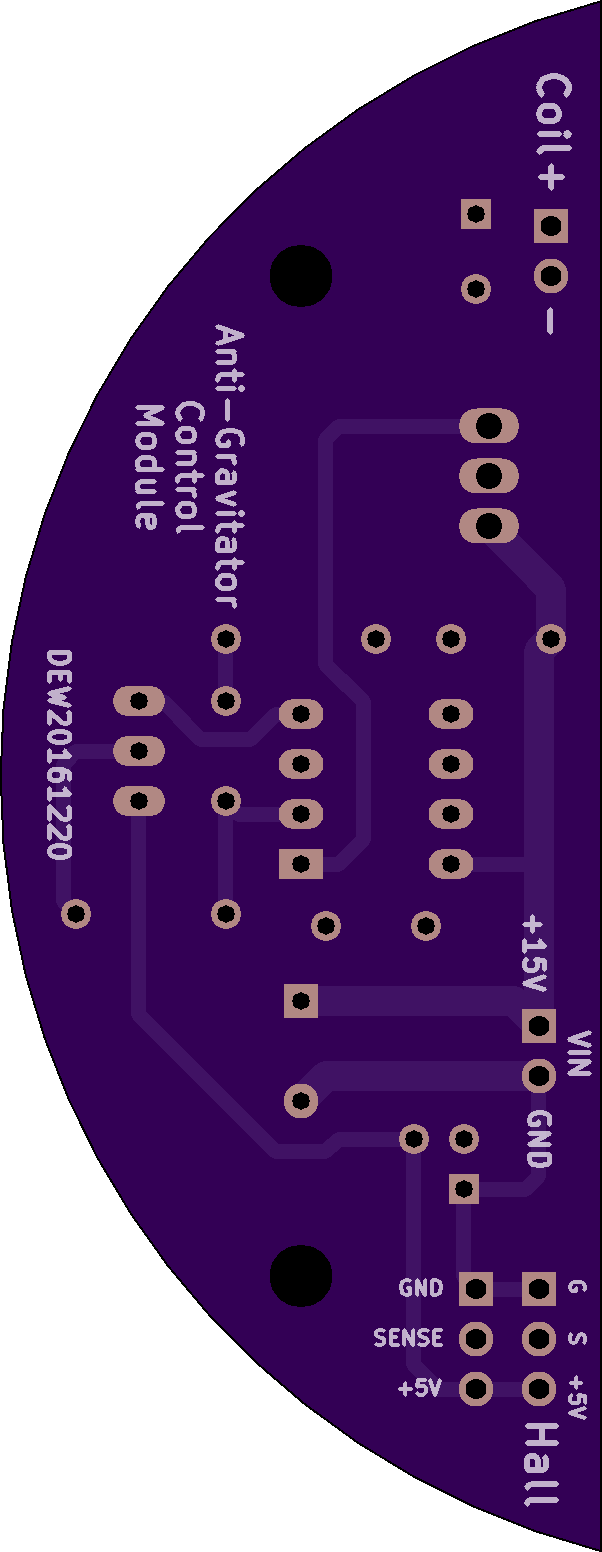
The Anti-Gravitator Thru-Hole Version
by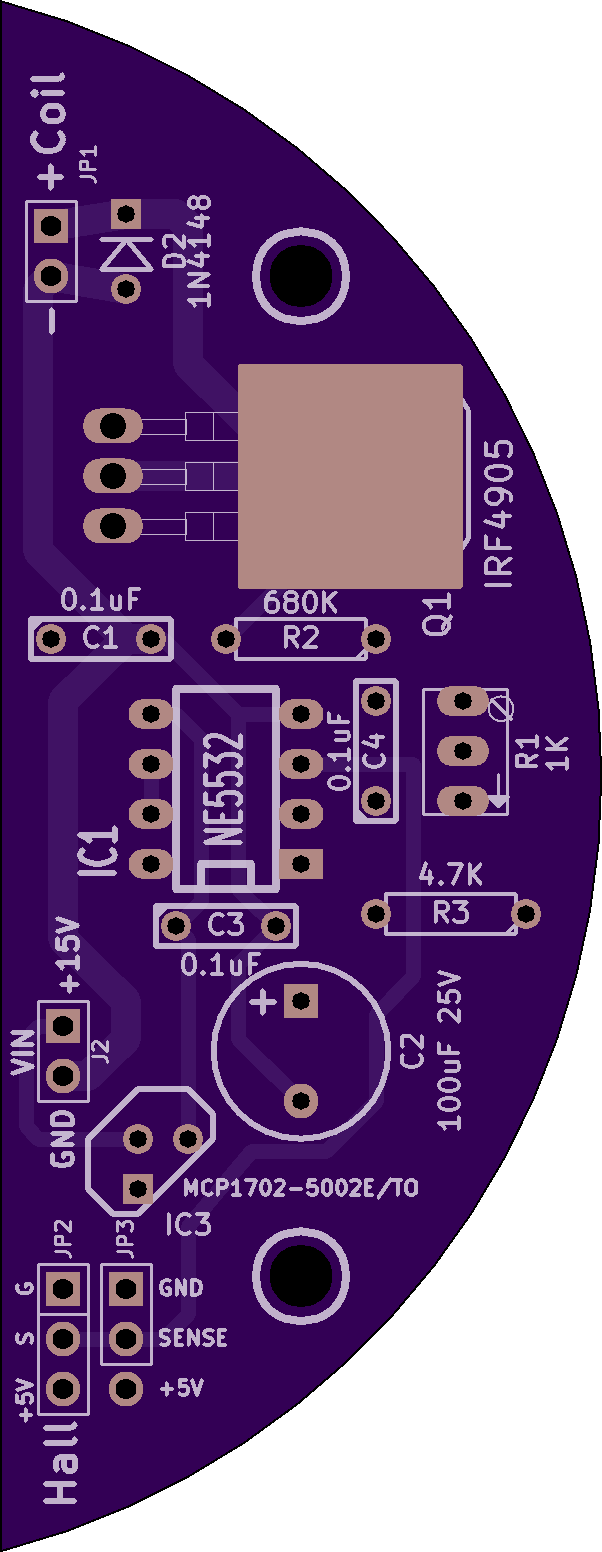
2
layer board of
1.21x3.10
inches
(30.61x78.84
mm).
Shared on
December 20th, 2016 07:41.
An inexpensive through-hole remix of the Thingiverse 943091 Anti-Gravitator. http://www.thingiverse.com/thing:943091
This version is designed to be less expensive to build than the original full-size Anti-Gravitator Control Module. Most of the board was completely unused so why pay so much for a set of three boards?
Also, to make it quicker to solder together and since I have a lot more through-hole parts on-hand than surface mount, I opted to change the design to be all through-hole.
More details and pictures can be seen on my Thingiverse posting: https://www.thingiverse.com/thing:1982994.
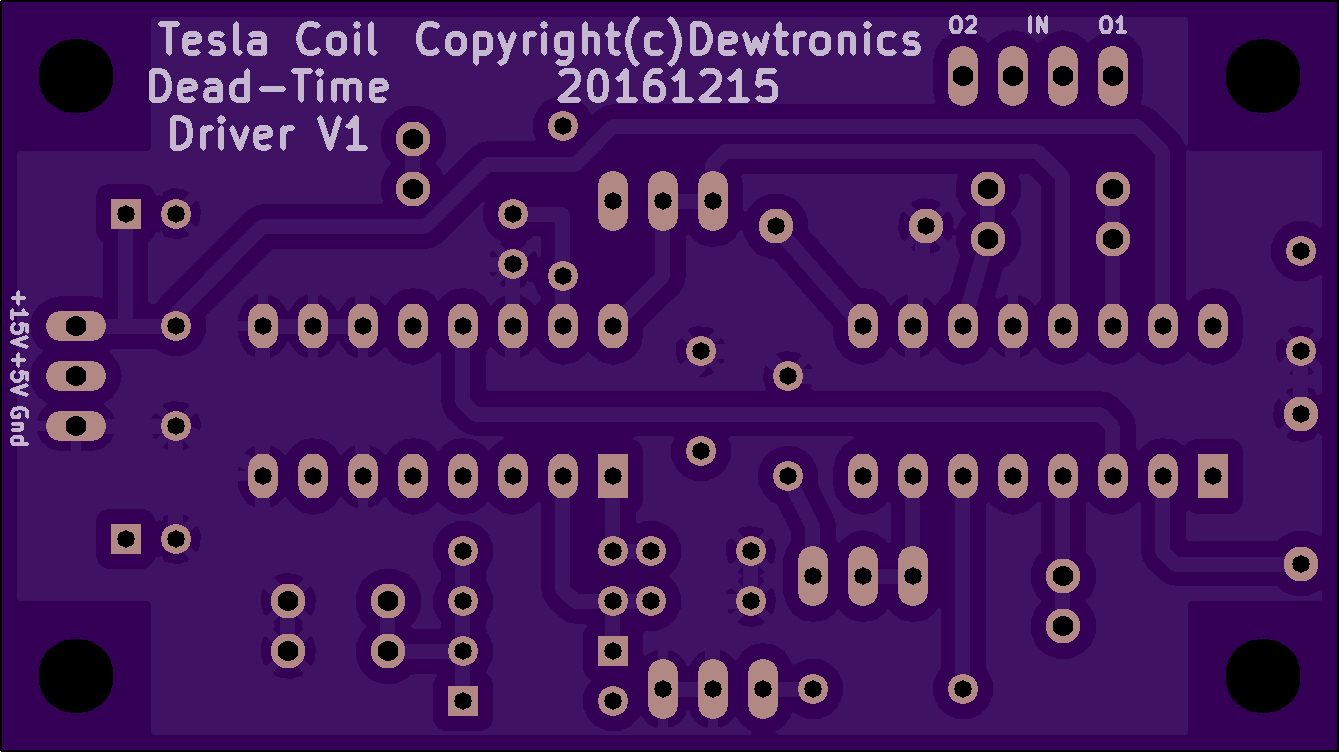
Tesla Coil Dead-Time Driver V1
by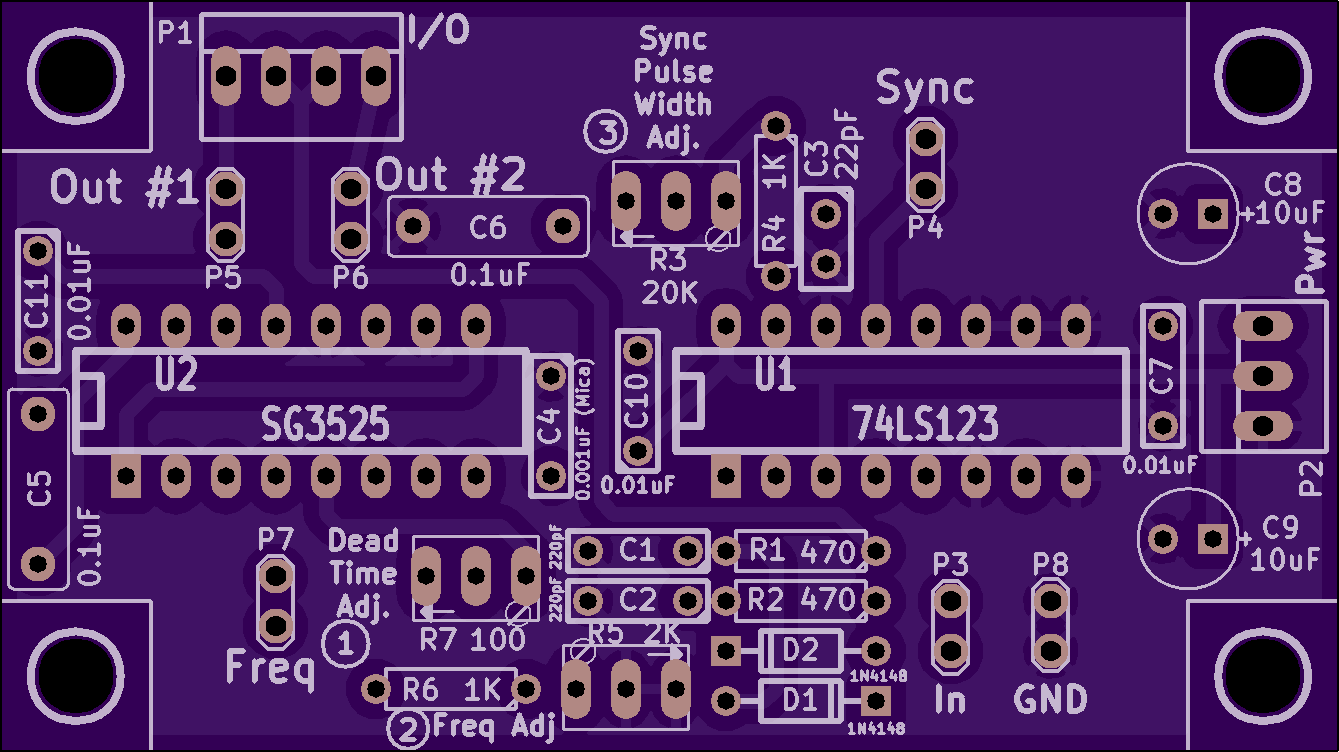
2
layer board of
2.68x1.50
inches
(68.05x38.20
mm).
Shared on
December 17th, 2016 19:11.
This is a PWM Dead-Time Driver add-on board for the oneTesla v1 Musical Tesla Coil. It’s used to add a Dead-Time between the gate pulses to the IGBT driver transistors to minimize overlap and prevent premature death of the transistors.
Design files can be found at https://github.com/dewhisna/TCDeadTimeDriver.
FlashForge Creator Pro 2016 HBP Heater Board V2
by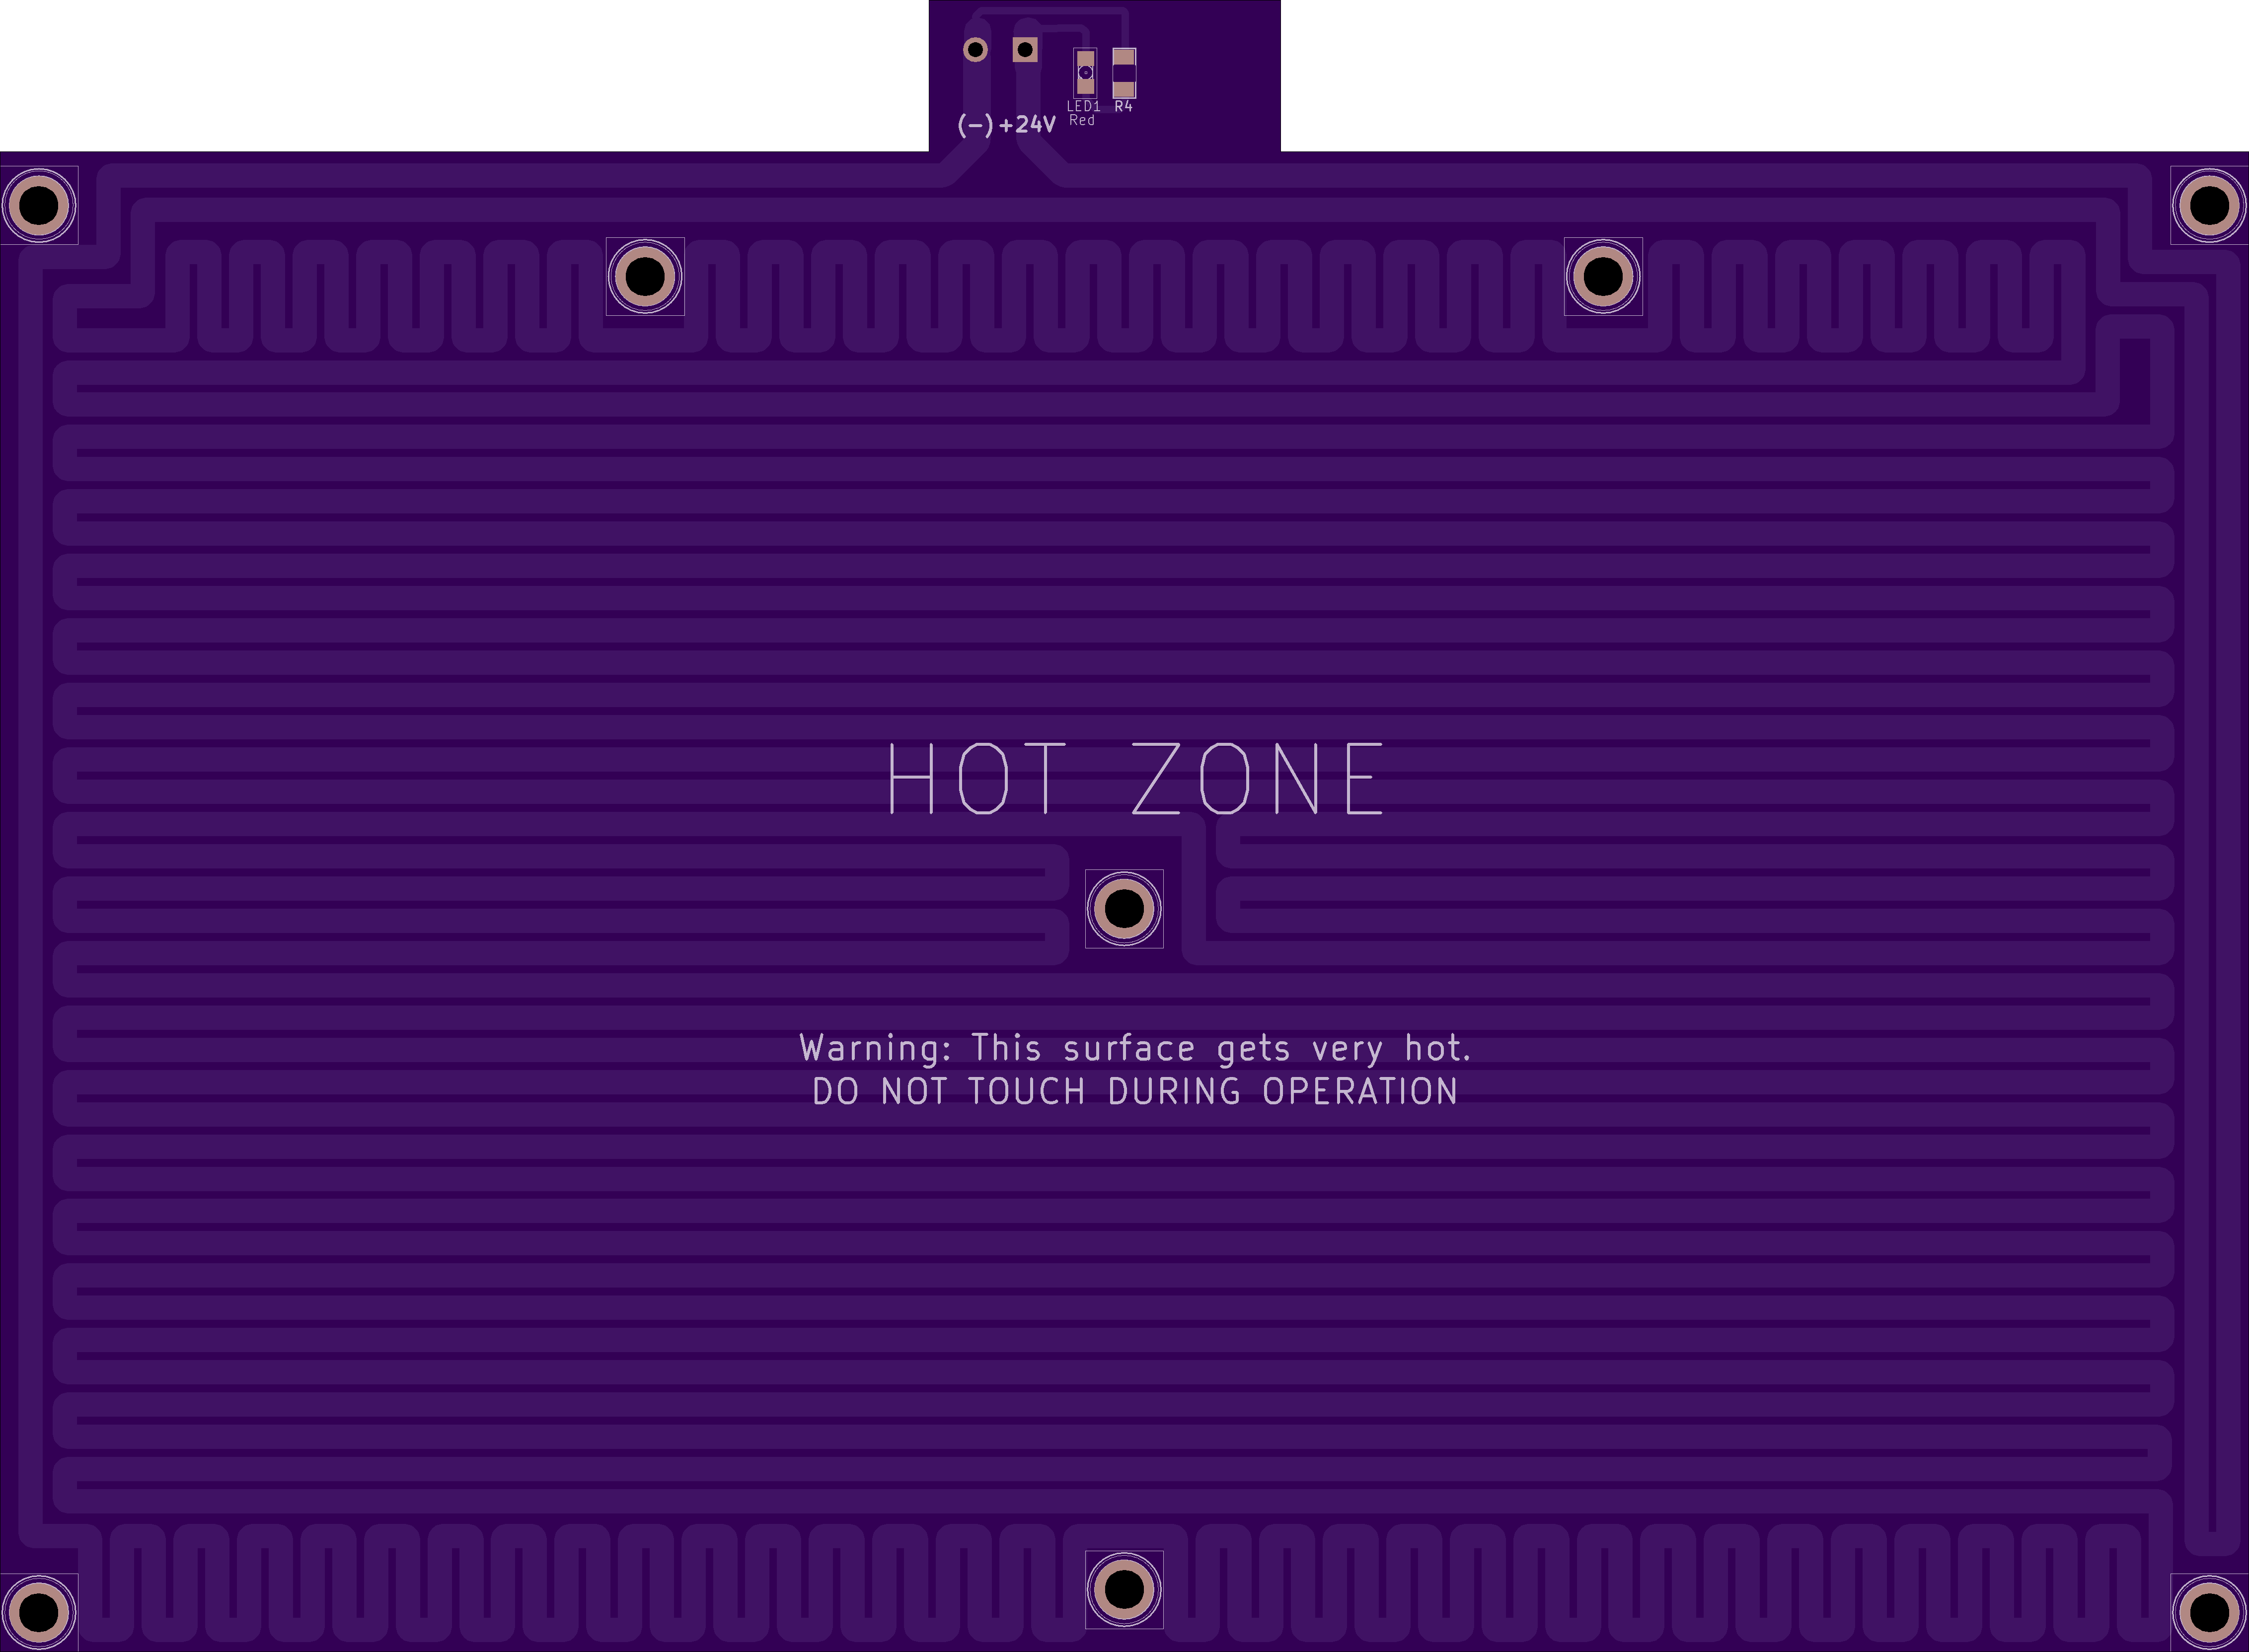
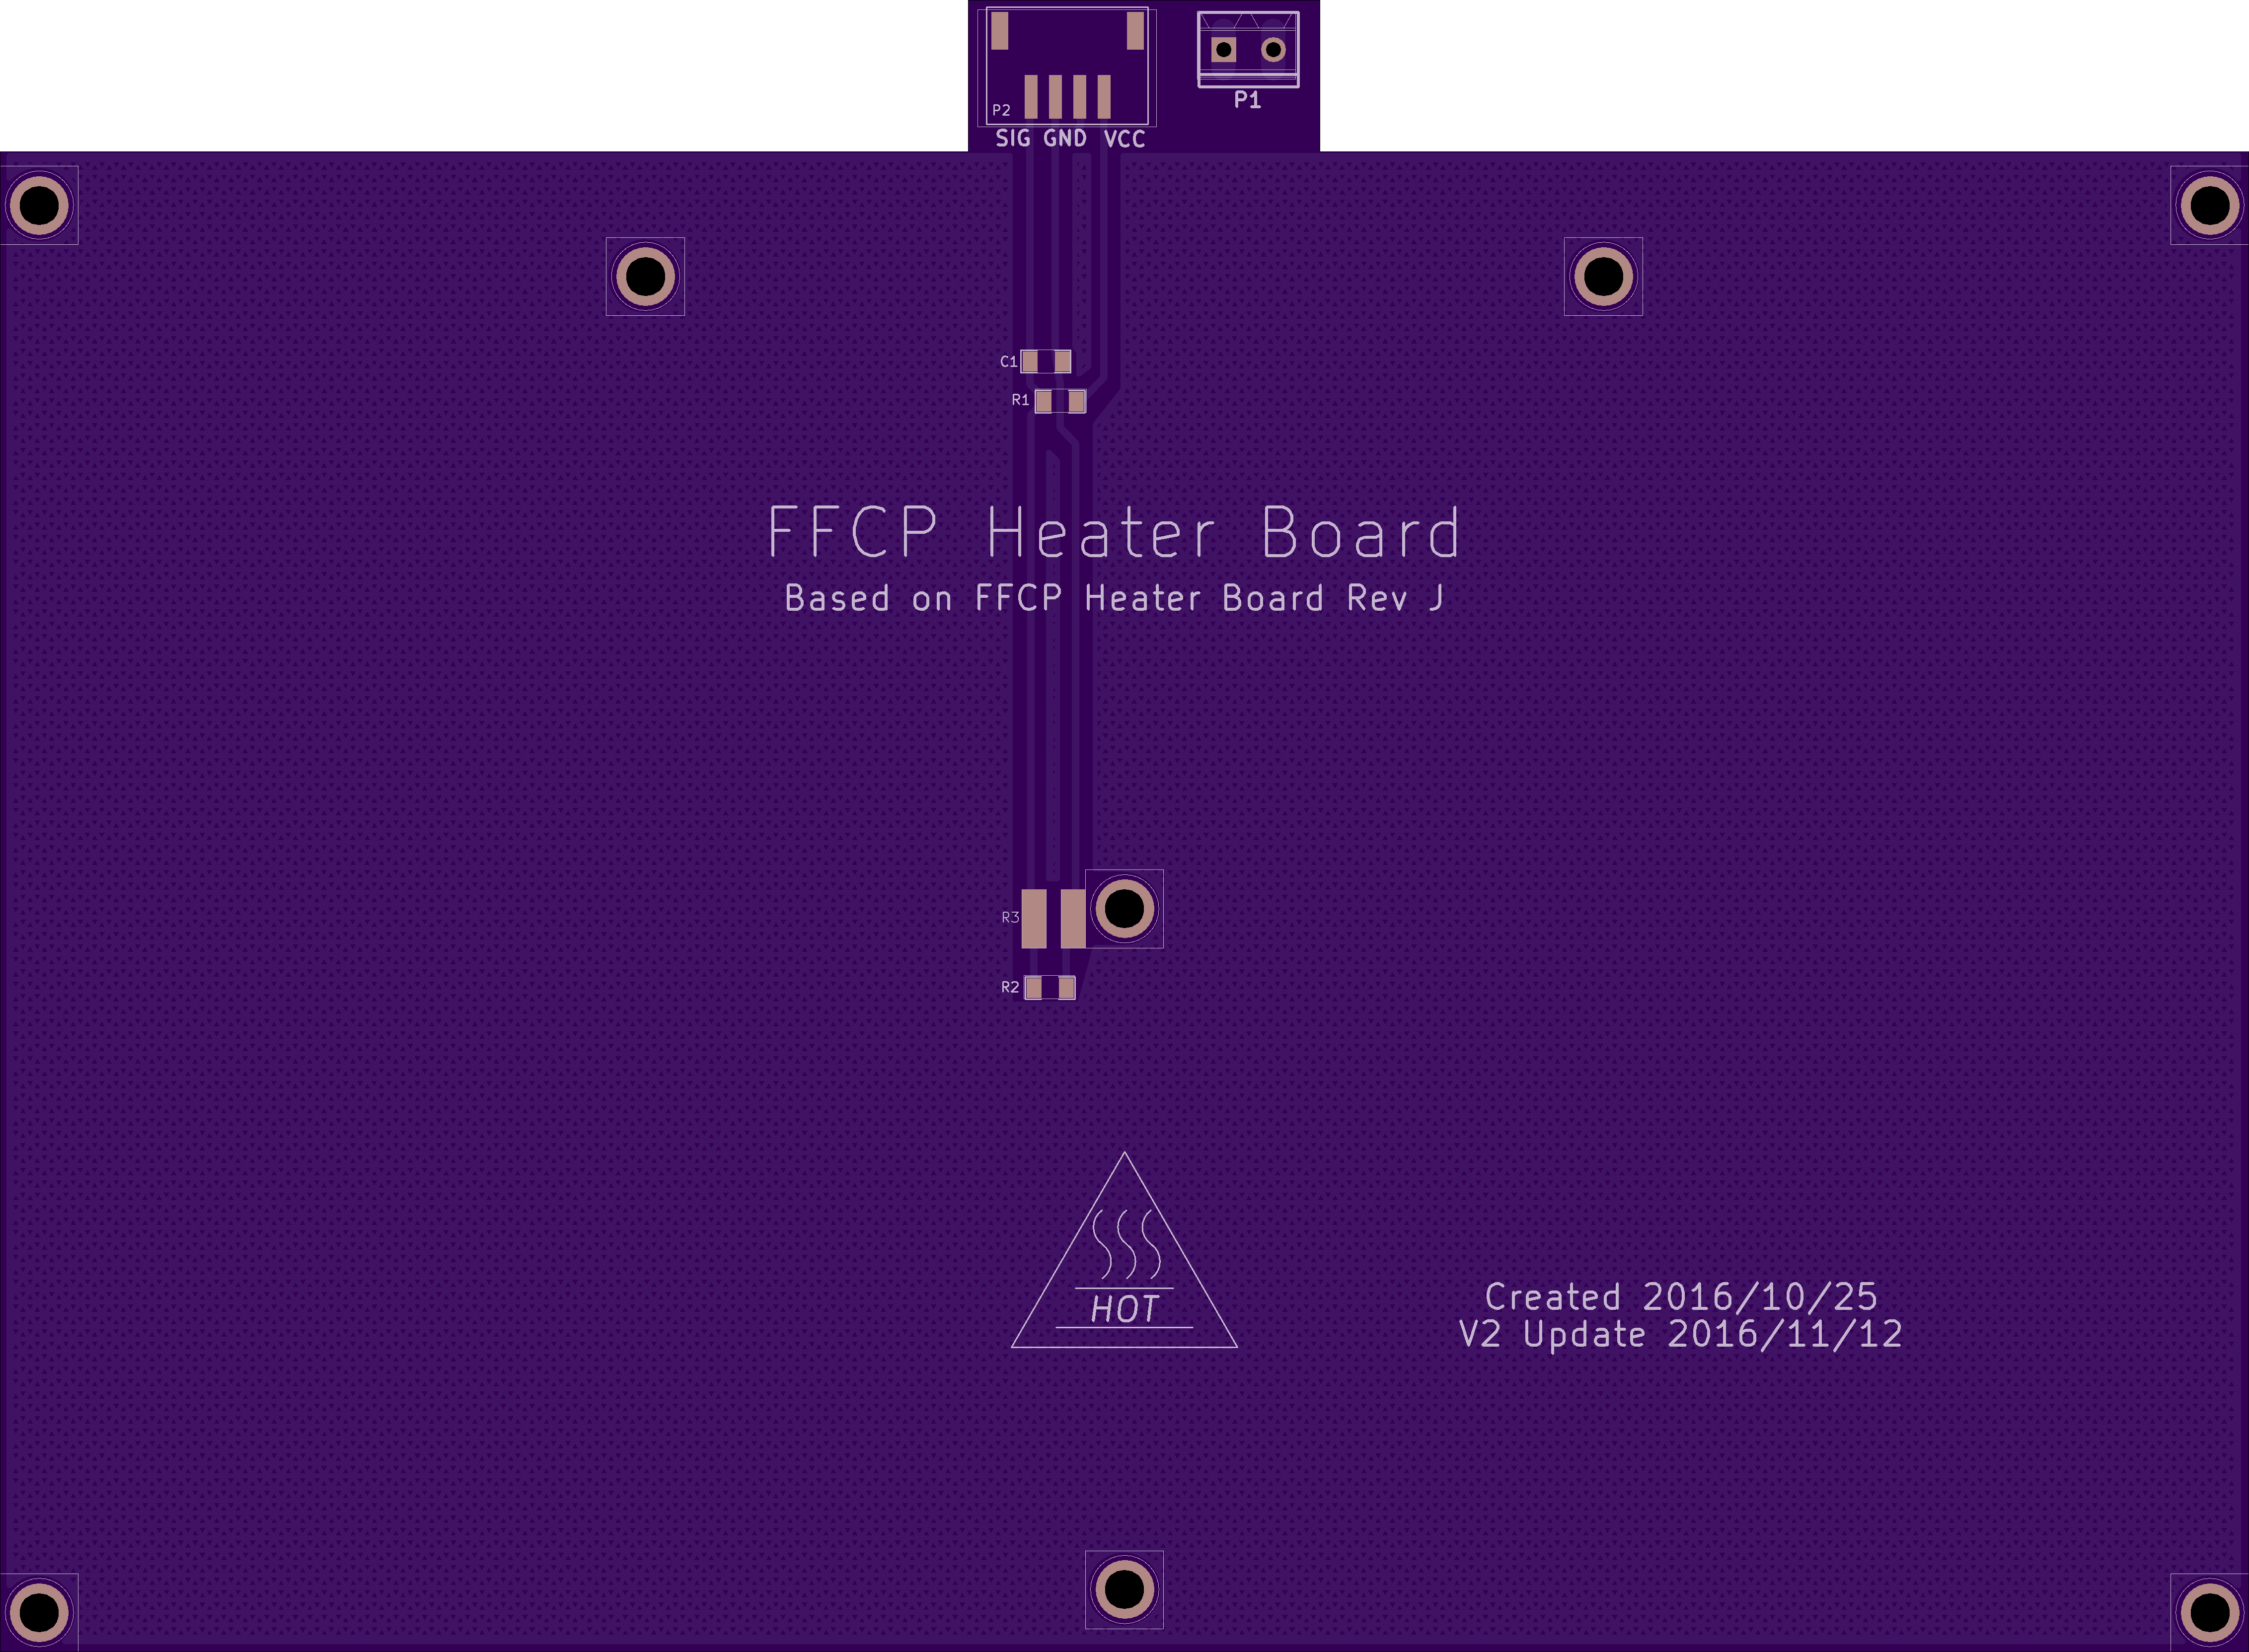
2
layer board of
9.06x6.65
inches
(230.02x169.01
mm).
Shared on
December 13th, 2016 12:39.
Heater board for the FlashForge Creator Pro 2016 printer. Based on the FFCP HBP PCB Rev J. Created to replace boards that die from bad connectors that melt and delaminate traces (since mine died after about 50 print hours).
Parts List:
P1: AMP TE 1744037-2 (DigiKey A112698-ND)
P2: S4B-XH-SM4-TB(LF)(SN) (DigiKey 455-2262-1-ND)
LED1: Red SMD 1206, such as LTST-C150KRKT (DigiKey 160-1405-1-ND) or similar
R1: 4.7K SMD 1206 (such as DigiKey RMCF1206FT4K70CT-ND)
R2: NTC 100K Thermistor SMD 1206, NTHS1206N01N1003JE (DigiKey: 541-1144-1-ND)
R3: Do not populate
R4: 1K SMD 1206 (such as DigiKey 311-1.00KFRCT-ND) (May need 1.2K or larger depending on voltage drop and current limits of the LED chosen)
C1: 0.1uF SMD 1206 ceramic (such as DigiKey 478-3618-1-ND)
Note: Use 1oz copper or thinner. If used with copper that’s too thick, you will overload your printer’s power supply or motherboard. Also, be sure to place a layer of Kapton tape between the PCB and the aluminum plate of your printer. The tape will both help the heat to evenly distribute as well as insulate the interface between the PCB and the aluminum plate and prevent electrical shorts should your PCB’s solder masks develop small scratches or nicks.
Disclaimer: While it’s believed that this design is complete, accurate, and functional. It has not been fully tested for all criteria or safety requirements. And since I can’t control the manufacturing or assembly of this board, I assume no responsibility for any damages or injuries, either direct or incidental, resulting from using this design or boards created from it, including, but not limited to, damage to the printer from circuit problems or to the surroundings from the result of fire or for burns or electrocution of users. This PCB is being provided here as-is as a reference for the hobbyist and do-it-yourselfer only.
However, if you do build one of these heater boards, I would be interested in hearing the details of how well it performs. Things like: the heating time it requires, amount of power it consumes, evenness of heat distribution, etc.
Several V1 Board Assemblies are available on eBay
As an alternative to replacing your PCB heater, you can also use a Keenovo Silicone Heater. Design Part Number 10452 is the Keenovo part for a 24V 130W unit that fits the FlashForge Creator Pro 2016. For it, you will need an HBP interface board to adapt it to the FlashForge’s MightyBoard Motherboard (i.e. the circuit which is already included on this PCB heater).
V2 Update: 2016/11/12 - Corrected the position of upper pair of mounting holes.