Skip to content

Introducing the GitHub Community Cast

At the heart of what makes GitHub great are the thousands of open source communities that build incredible things every day. The brand new GitHub Community Cast shines a light on these awesome projects and the people that make them.

Take a look inside a project, learn about their tools and workflow, discover where you can get involved, and get inspired for your own work. In addition to seeing behind the curtain on a great open source project, you'll also get news and updates from around the GitHub community.

The inaugural episode features an interview with Andy Miller from the Grav project, a modern flat-file CMS with some bold ideas. We also share some of the new features recently landed in GitHub and events going on around the GitHub community.

podcast

You can each episode from our SoundCloud page or subscribe to the podcast feed.

Creating a new contributor on-ramp

One of the most important elements of creating a strong community is shaping the new contributor experience. The on-boarding experience for new participants plays a huge role in how quickly someone can get up and running on your project. The most successful projects make this experience simple and accessible.

Getting someone started with their first contribution in a community typically follows a linear path, from discovery through appreciation. The environmental factors surrounding your project play the largest role in making that experience comfortable, empowering, and worthwhile.

The new contributor on-ramp

The on-ramp is a framework for growing your community. From getting your project noticed through celebrating a new contributor, building out each area will help your community thrive.

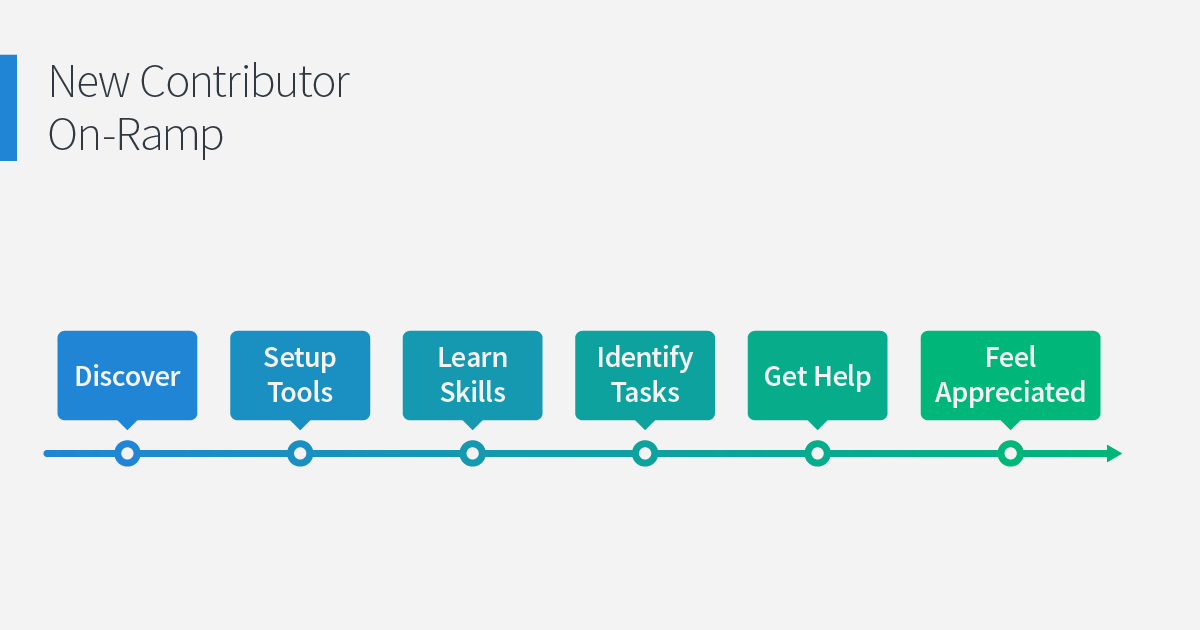
New Developer On-Ramp

At the beginning is a user that hasn't yet discovered your community. And at the end is a user that has made their first contribution to your project. Along their journey, the user usually goes through six steps of progress:

  1. Discover that the community exists and welcomes contributions from new members.
  2. Setup tools needed to build the project and create a contribution (e.g. editors, compilers, libraries, frameworks).
  3. Learn skills and knowledge to understand the codebase, contribution guidelines, and understand how their contribution will be reviewed.
  4. Identify tasks to work on, or know what kind of contributions would be welcome and worthwhile.
  5. Get help with the questions, queries, and sticking points they may have with their first contribution.
  6. Feel appreciated when they have successfully made their first contribution and at other key moments to know that the community is kind, supportive, and welcoming!

Within each of the six steps, there are many different things you could implement. This series will take a look at each step in turn, and for the rest of this post we'll delve into what you can do to help your project be discovered.

Discover

"If you build it, they will come" only works for Kevin Costner and baseball fields. For your project, the first step in building a community is making your project discoverable.

There are three goals for the discover step in the on-ramp:

  1. Welcome and inform new visitors about the community
  2. Establish your project as inclusive and welcoming of new contributors
  3. Show people how they can begin to contribute to the community

There are plenty of options on how to achieve these goals, below are a few of the basics that every community can use.

Create a README.md file

Whenever you visit a GitHub repo, the contents of the README file is displayed underneath the file listing. It is a great opportunity to give a quick overview, including:

  • What your project is and what it does
  • How to build and run the project
  • Ask for new contributors
  • Provide details on how to get started, such as a CONTRIBUTING.md file

By using Markdown you'll be able to format the README for easier viewing and link to resources for new contributors. Plus it'll look great!

Create a project website

While a README.md is a good start, many projects can benefit from a comprehensive website. A full site gives the project a home for things like extensive guides, tutorials, and blogs.

Build the site from the perspective of a new user to your project:

  • Highlight the features of the project (with screenshots, if applicable)
  • How to install it
  • How to use it
  • Where to get in touch with the community
  • How to get involved in the community

The front page should have the most important information, like what the project does, how to get it, and how new contributors can join. Check out Bootstrap, Jekyll, or Electron for some ideas for your project site.

A fast way to get started with this is with GitHub Pages, which provides free hosting for a project website. When you create this site it will be publicly hosted at http://<yourproject>.github.io.

Engage on social media

Social media is a powerful tool for raising awareness about your project. Many people will follow the social media accounts of projects to keep up-to-date on news and announcements, it is also a great place to engage new contributors. Though tread lightly at first as social media can be time-consuming to maintain.

Twitter and Facebook are the best places to start. After registering the accounts, take some time to spruce up the profiles. Match the account design to your project website, and link back to it.

You can grow your community on social media by providing valuable and interesting content. Images and video are great additions to social posts. Be careful not to over-saturate your audience with too much content though. You should stick to:

  • Links to blog posts with updates, news, and other material
  • Videos with demos, screenshots of new features, and other visual content
  • Invitations for users to participate in issues, surveys, or other ways of getting engaged
  • News about growth of the project, partnerships with companies/organizations, and interesting use cases

A useful tool to simplify social media is Buffer. You can prepare your posts and content ahead of time, and it'll publish it on a schedule. By dedicating time to your social media strategy, you can free up your time for the week ahead.

Promote the community

There are many other ways to get the word out and highlight the work happening in your community. A few places you can start:

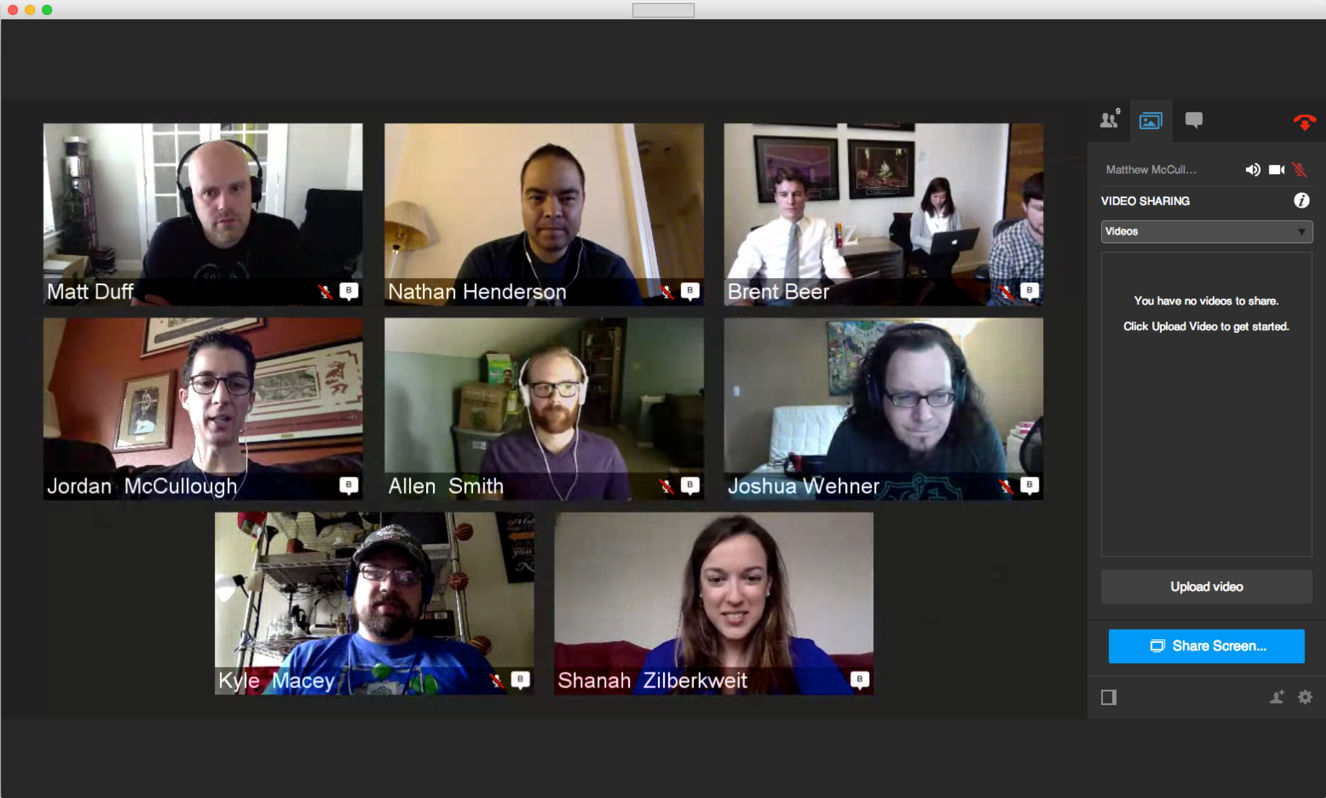
  • Organize Google Hangouts on Air to host an interactive show that gets the community involved. A bi-monthly show could be used to demonstrate new features, answer questions, or feature a new contributor.
  • Do interviews on podcasts, news website, and blogs to talk about the vision of the project and get people involved. It is often as simple as asking the site or podcast if they'd be interested in featuring your project.
  • Speak at conferences to show the great work going on in the project and provide simple steps for how people can get involved.

The new contributor on-ramp is a valuable framework to make the new user experience simple, empowering, and effective. These basic building blocks will setup your project to have a healthy and thriving community of contributors. We'll dive into the Setup Tools and Learn Skills steps in the next installment of the series.

Udacity joins the Student Developer Pack

Student Developer Pack + Udacity

Following up on the release of the Ruby Nanodegree program that we co-created with Udacity, we've extended our partnership to offer GitHub Student Developer Pack members one month of free access to any Nanodegree program. Pack members can choose from Android Developer, Front-End Web Developer, Data Analyst, or any of the 12 Nanodegree programs offered by Udacity.

In a Nanodegree program, you will:

  • Learn at your own pace from industry experts at Google, Facebook, and GitHub
  • Get access to coaches who provide you with personalized guidance, accountability, and code review
  • Create a portfolio of work to showcase your skills
  • Receive career support to help with your job search, and a guaranteed job when you sign up for Nanodegree Plus

The Student Developer Pack gives students free access to the best developer tools from 15 different technology companies like Stripe, Travis CI, and Unreal Engine. Now, with Udacity included in the pack, it's even easier for students to get started learning to program with professional tools.

Students, get your pack.

Kindly Closing Pull Requests

Getting your first pull request from an outside contributor on GitHub is an exciting experience. Someone cared enough about the problem you were solving to check it out themselves, change something, and contribute that change back to your project. When your project has a relatively small number of high-quality, desirable incoming pull requests it is easy to happily merge them.

Where things can become more difficult is when your project becomes more notable and the quality, desirability, or number of pull requests you receive causes difficulties. Now the positive feeling you had about the time people spent can be reversed; you don't want to reject someone's work when they have already spent the time to get it included.

Let's discuss some common types of pull requests that can be closed and how to do so in a way that encourages positive behavior in your community (rather than discouraging participation).

Close pull requests you will never accept

Sometimes outside contributors will submit pull requests for changes that you don't want to make to your project. For example, they may submit a feature you consider to be out-of-scope for your project. In this case the best option is to politely explain to users that, although you value their contribution, you are unwilling to accept it and close their pull request. Ideally, also explain to them and in a CONTRIBUTING.md file how they can get a better indication in the future on what would or would not be accepted before they begin the work. The github/git-lfs project's CONTRIBUTING.md file provides a good explanation of what features might be accepted.

Close pull requests you cannot accept

Hopefully you have continuous integration set up for your project to test pull requests before they are merged. In some cases, outside contributors may submit a change that breaks continuous integration tests and they may be unable or unwilling to make the changes required for the pull request to be merged. Another situation that can occur is that you request changes be made but the contributor never responds. In this case, it's better to close the pull request after a fair amount of time with no response or fix (e.g. a couple of weeks) and note this policy in a CONTRIBUTING.md file (e.g. that merging a pull request requires passing tests). This does not need to be permanent; the contributor can always make more changes and submit another pull request in future.

Close pull requests on unmaintained projects

You may have created a project to solve a particular problem that you no longer have and open-sourced it just to share it with the community. In this case, consider documenting it in the README that you will not be accepting pull requests and close any that are submitted. Hopefully the clarification of project status in the README means the project will not receive any pull requests. If this is decided when you already have open pull requests: politely close them and explain why.

If your community has enough interest in maintaining the project they may fork it and decide to manage contributions there. A great final thing you can do with your project is to point people to the new project in the README and "bless" it as the new version of your project.

Close pull requests that turn sour

Discussions on pull requests can sometimes deviate from the original intent of the pull request and may even become unpleasant. In those cases, prioritize care for yourself and your community by closing (and optionally locking) pull requests. The original intent can be dealt with in another pull request.


For every pull request it's important to consider the users and maintainers of your project and ask yourself, "would merging this pull request make the project better or worse for them?". If you cannot answer "better" to this question: spend the time to help the outside contributor alter the pull request or submit another pull request for something you would be able to merge. Do not merge pull requests out of guilt for how much work the submitter has put in; you will only regret doing so in the long-term.

Although it's never nice to reject someone's work it's preferable to leaving pull requests open that you will never merge. Those pull requests will just hang over you and the contributor indefinitely. One of the indicators of a healthy project is its responsiveness to contributions, whether it is giving feedback, merging, or closing pull requests.

This post explains some of the reasons why you might want to close pull requests on your project and how to do so. We hope this helps project maintainers and contributors use pull requests to build software more effectively.

Upgrading your Textile posts to Markdown

A month ago, we announced that GitHub Pages had upgraded to Jekyll 3.0.

Starting May 1st, 2016, GitHub Pages will no longer support Textile. If you are currently using Textile (Redcloth) to author your Jekyll site, you'll need to convert your site to use Markdown instead.

Here are some tips for converting from Textile to Markdown.

Manual conversion

On sites with just a few Textile pages, editing those by hand may be the fastest way to convert to Markdown. Here are some of the most important changes.

Textile Markdown
headings h1. text # text
h2. text ## text
h3. text ### text
links "link-text (title)":url [link-text](url "title")
bullet lists * item * item
** nested item * indent nested item
numbered lists # item 1. item
## nested item 1. indent nested item
italics _italics_ _italics_
bold *bold* **bold**
code <code> code </code> `code in backticks`
blockquotes bq. text... > text...

For more details refer to the Textile docs and the GFM cheatsheet

Automated conversion from .textile to .md with pandoc

Users with many Textile files in their Jekyll Pages site can leverage pandoc, a utility for converting between different markup formats.

The tomd shell script uses awk and sed to overcome the biggest limitations of pandoc, filtering out the sections listed below, which pandoc doesn't recognize, and re-inserting them into the converted Markdown.

  • YAML frontmatter at the top of .textile files
  • {% highlight %} blocks
  • <notextile> blocks

To run tomd

  1. Install pandoc from https://github.com/jgm/pandoc/releases or here.
  2. Download or clone tomd.
  3. Copy the tomd script and the two .awk files into your Jekyll project.
  4. Invoke the script with ./tomd from inside your Jekyll project folder.
  5. Validate the results.

The script will look for any .textile files in the _posts directory, convert them to .md, and leave backups of the original .textile files in a new directory called _old_posts. You can override the names of the directories with arguments to the script.

If everything works, you will see output like:

screen-shot

NOTE: This process may still produce some incorrect output, so check your results.

Known issues include:

  1. Lost CSS references e.g. from Textile .p(classname)
  2. Literal HTML mixed with Textile formatting e.g. <sup>"textile-link-text":url</sup>

Running under Windows

The latest version of pandoc for Windows can be downloaded from https://github.com/jgm/pandoc/releases/.

In addition to pandoc, tomd requires a unix-y shell and utilities. The easiest way to get those for Windows is by installing the default set of cygwin utilities.

Before running tomd, use cygwin dos2unix and run it against the tomd file to remove extra linefeeds.

The output of running tomd in the cygwin shell should look very similar to the OSX output above.

Posters are here!

Posters featuring some extraordinary Octocat moments are now available in 8.5"x11", 18"x24", and 24"x36" sizes*. Check them out in the GitHub Shop

Posters

*Frames not included

Meet Judy Gichoya, Doctor and Developer

To highlight the people behind projects we admire, we bring you the GitHub Developer Profile blog series.

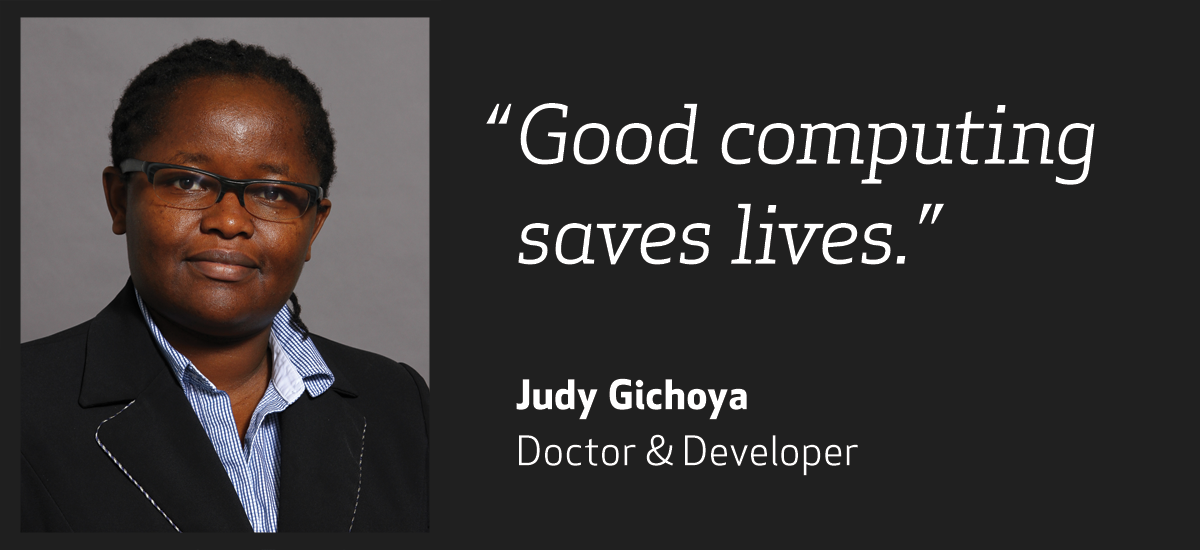
Meet Judy Gichoya, Doctor and Developer

Judy Gichoya is a medical doctor specializing in radiology, but she’s also an experienced programmer who is accelerating the growth of OpenMRS. With a mission to improve healthcare delivery in resource-constrained environments, OpenMRS is coordinating a global community to create a user-driven, open source medical record system platform that helps ease the work of health care providers. We asked Judy to share the story of how she became a developer, and what she’s learned from her work.

Erin: How long have you been developing software?

Judy: In 2001 I was enrolled at a local college in Nairobi to learn accounting when a family doctor noted that it would be more helpful for me to learn technology-related courses. I dropped off accounting and used the money that I had to enroll into IMIS, which taught technology and management concepts. I was required to work on a project in either Pascal or Visual Basic, and that's how I started programming. The challenge with being a student at this point was that we did not have enough teachers who understood programming, so most of the work that I did was self-taught by following tutorials on the Internet.

In 2003 I joined medical school and subsequently kept programming. I needed some money for school fees and joined a local company where in the evening after school I assembled their desktops. I assembled close to 10 computers every evening and hence got a good feel of the range of hardware available. I continued to learn more on programming, focusing on Java at that point. Around 2007 when I was doing my clinical rotations, the number of patients we treated with HIV-AIDS overwhelmed me, and I started wondering how the data for the care would be organized. A local nonprofit organization called AMPATH was starting to explore the use of OpenMRS, an open-source medical record system to help manage the patients and that’s how I got involved.

Erin: What programming languages do you use?

Judy: I started off using Java, but that can be a difficult language to learn in a developing country as it’s hard to find good teachers and mentors. I moved to using Python, Angular JS and various HTML5 technologies, and I wish I had made this move earlier. I am learning Node JS and tinkering with machine learning for some data analysis that I want to do in radiology.

Erin: Who did you look up to in your early days of software development?

Judy: A developer called Ben Wolfe, who was working on OpenMRS in the US, visited Kenya and provided local training to interested people. I found him very inspiring and knowledgeable. Doctors who write code have always surrounded me, and so it was a natural fit for me once I graduated as a medical doctor to continue writing code. I have interacted with many physicians who continue to do that both in the U.S. and worldwide. We all know diversity issues are a big problem, and I cannot say that I had any woman to look up to or work with when I started out.

Erin: Tell us about your journey into the world of software development

Judy: The very first time I saw a computer was in high school. We received a donation of 10 computers running Windows 3.1 for a computer lab that was used by more than 300 students. The school was looking for some volunteers to learn computers, and I jumped on the opportunity. This provided for guaranteed time using the computers, but my Agriculture teacher was very disappointed and thought it was a big mistake. We shared one teacher across the whole province, which meant several schools relied on him to teach a few days every month.

We were falling behind, so I started to study ahead of everyone else to help the 10 students who were going to seat a final examination in computers in order to graduate from high school. This experience sufficiently enabled me to be self driven in personalized learning, and taught me how to maximize use of available resources.

I had close to US$200 saved after graduation (actually from selling chicken). I bought a second-hand computer and took it home. We did not have electricity in my village home and I had to hide it from my dad who would not approve. I set up my computer in my uncle's house would go there and use it and then go back home.

When it finally came time to do programming, I modified a ‘hello world’ application to be ‘hello Judy’.

Erin: What resources did you have available when you first got into software development?

Judy: In 2002 while pursuing IMIS certification, Strathmore University had several computer labs that I could use, furnished with Internet. I made friends along the way who were interested in programming and so we had a good support group that could help each other.

When I started working at OpenMRS, their community was the biggest resource for helping me get started with Java programming. They were available on IRC and Google groups and once I learned how to use the Wiki to search previously-asked questions and ‘how to’ pages, things got a little better. Despite the experience that most open-source products are poorly documented, the large and vibrant OpenMRS community contributed a lot to my learning.

Erin: What have you learned as a developer?

Most of my work has been around medical record systems, and I can say that good computing saves lives. What has happened over the last few years is how remarkably easy it's become to develop software. And therefore the developer needs to be integrated within an ecosystem that's trying to tackle a problem whether it's business or for impact, and this is the only way I think to be relevant.

There have been lots of changes of perception about developers. Initially there was a myth that developers were weirdos, but now you know developers have become celebrities. Moreover there is lots of hype for looking for the next Google or the next Facebook and I think it's easy for other people to get caught up in the circus.

Erin: Is there any advice you’d give someone just getting into software development or open source?

Judy: Looking back on my experience, I would say stay passionate about what you care about and be persistent. Open source is not easy as you know, your questions can get answered two weeks later, or sometimes never answered, and so persistence is key. For those who are worried about income or business, there is a lot of opportunity in open source.

If you were starting out specifically in a limited resource setting, I would encourage you to learn languages that take a shorter time to become proficient in, and where you have available resources to make you successful.

Erin: Can you share some background on OpenMRS and how it’s changing global healthcare?

Judy: Around 2007, a group of 4 physicians working in global health in Kenya and Rwanda came together at the Medinfo San Francisco conference during break in a café to figure out a solution to scale up providing care in their countries. On napkins, they brainstormed the first data model that would lead to OpenMRS. Three developers initially worked on the project, but since day one, there was a strong desire to open source the project that led to a community of friends growing around OpenMRS.

Our experience is that people wanted tools to use that were local to their problems, and OpenMRS provided a starting point for them to tackle their specific problems. We had some academicians who had grants that were looking at health technology adoption and assessment in various countries. They never recommended OpenMRS, but the local initiatives picked up OpenMRS as the tool to use to get started. This led to several national implementations of OpenMRS including Rwanda, Kenya, Vietnam, Uganda, and Mozambique with more countries increasingly adopting OpenMRS to provide health care.

Erin: Tell us a bit about the community that is contributing to OpenMRS. How has it changed over the years? What are some urgent needs you have?

Judy: What started off as three developers working on OpenMRS full-time has resulted into this large community. Our community is organized around implementers, people who do not necessarily have development expertise but use our software, and developers who actively write code for OpenMRS. We have developers from all over the world as we are in use in over 42 countries (https://atlas.openmrs.org/).

One thing we have not been able to do well has been to track forked off code contributions. Every month we have a surprise article or new development /use case of OpenMRS that we were not aware of. I guess this can be considered a success in the open source community. But it would be good to convince people who have forked code to contribute back to the community.

Running our diversity statistics was rather embarrassing since this is an area we lag behind in. We have organized developer levels that people can work towards and we had no /dev/5 developers who were female. We need more people working on OpenMRS, and are working towards a certification program powered by open source learning. We still are looking for funding to support our MOOC launch. Most importantly, our mission is that information is care. Most of the areas where we work have very limited resources, and we only tackle one end of the big global health problem by providing software. We need resources and partners to help us accelerate tackling the health problem in limited resource settings.

Erin: Where do you see the future headed for open source software in healthcare?

Judy: As we grow older and people live longer, caring for patients is increasingly more complex. In developing countries, open source technologies support leapfrogging through the health divide to take care of the high burden of communicable and noncommunicable diseases. For developed countries, the health care data is locked into vendor systems and doctors cannot get evidence by quickly searching the data. For example, I am using OpenMRS to run a disease registry to track outcomes of patients that receive treatment with Yttirum 90 for advanced liver cancer in the US. Before introducing this project, a solution had been sought for years and required a huge capital cost. I see open source playing a big role in these fields to provide such flexibility

Learn more about Judy and her work on her website, or get in touch on Twitter.

Working with submodules

Eventually, any interesting software project will come to depend on another project, library, or framework. Git provides submodules to help with this. Submodules allow you to include or embed one or more repositories as a sub-folder inside another repository.

For many projects, submodules aren't the best answer (more on this below), and even at their best, working with submodules can be tricky, but let's start by looking at a straight-forward example.

Adding a Submodule

Let's say you're working on a project called Slingshot. You've got code for y-shaped stick and a rubber-band.


flickr photo shared by young@art under a Creative Commons ( BY ) license

At the same time, in another repository, you've got another project called Rock—it's just a generic rock library, but you think it'd be perfect for Slingshot.

You can add rock as a submodule of slingshot. In the slingshot repository:

git submodule add https://github.com/<user>/rock rock

At this point, you'll have a rock folder inside slingshot, but if you were to peek inside that folder, depending on your version of Git, you might see ... nothing.

Newer versions of Git will do this automatically, but older versions will require you to explicitly tell Git to download the contents of rock:

git submodule update --init --recursive

If everything looks good, you can commit this change and you'll have a rock folder in the slingshot repository with all the content from the rock repository.

On GitHub, the rock folder icon will have a little indicator showing that it is a submodule:

screen shot 2016-01-27 at 4 55 10 pm

And clicking on the rock folder will take you over to the rock repository.

That's it! You've embedded the rock repository inside the slingshot repository. You can interact with all the content from rock as if it were a folder inside slingshot (because it is).

On the command-line, Git commands issued from slingshot (or any of the other folders, rubber-band and y-shaped-stick) will operate on the "parent repository", slingshot, but commands you issue from the rock folder will operate on just the rock repository:

cd ~/projects/slingshot
git log # log shows commits from Project Slingshot
cd ~/projects/slingshot/rubber-band
git log # still commits from Project Slingshot
cd ~/projects/slingshot/rock
git log # commits from Rock

Joining a project using submodules

Now, say you're a new collaborator joining Project Slingshot. You'd start by running git clone to download the contents of the slingshot repository. At this point, if you were to peek inside the rock folder, you'd see ... nothing.

Again, Git expects us to explicitly ask it to download the submodule's content. You can use git submodule update --init --recursive here as well, but if you're cloning slingshot for the first time, you can use a modified clone command to ensure you download everything, including any submodules:

git clone --recursive <project url>

Switching to submodules

It can be a little tricky to take an existing subfolder and turn it into an external dependency. Let's look at an example.

You're about to start a new project—a magic roll-back can–which also needs a rubber-band. Let's take the rubber-band you built for slingshot, split it out into a stand-alone repository, and then embed it into both projects via submodules.

You can take everything from the Project Slingshot's rubber-band folder and extract it into a new repository and even maintain the commit history.

Let's begin by extracting the contents of the rubber-band folder out of slingshot. You can use git filter-branch to do this, leaving you with just the commits related to rubber-band. The git filter-branch command will rewrite our repository's history, making it look as if the rubber-band folder had been it's own repository all along. For more information on git filter-branch, see this article.

The first step is to make a copy of slingshot to work on—the end-goal is for rubber-band to stand as its own repository, so leave slingshot as is. You can use cp with -r to recursively copy the entire slingshot folder to a new folder rubber-band.

cd ..
cp -r slingshot rubber-band

It looks like rubber-band is just another slingshot, but now, from the rubber-band repository, run git filter-branch:

cd rubber-band
pwd # (double check before proceeding!)
git filter-branch --subdirectory-filter rubber-band -- --all

At this point, you'll have a folder rubber-band, which is a repository that sort of resembles Project Slingshot, but it only has the files and commit history from the rubber-band folder.

Since you copied this from slingshot, the new repository will still have any remote tracking branches you setup when it was slingshot. You don't want to push rubber-band back onto slingshot. You want to push this to a new repository.

Create a new repository for rubber-band on GitHub, then update the remote for rubber-band. Assuming you were calling the remote origin, you could:

git remote set-url origin https://github.com/<user>/rubber-band

Then you can publish the new "generic rubber-band module" with git push.

Now that you've separated rubber-band into its own repository, you need to delete the old rubber-band folder from the slingshot repository:

git rm -r rubber-band
git commit -m "Remove rubber-band (preparing for submodule)"

Then update slingshot to use rubber-band as a submodule:

git submodule add https://github.com/<user>/rubber-band rubber-band
git commit -m "rubber-band submodule"

Like we saw before when we were adding rock, we now have a repository-in-a-repository. Three repositories, in fact: the "parent" repository slingshot, plus the two "sub" repositories, rock and rubber-band.

In addition, if we dive back into slingshot's history, we'll see the commits we originally made into rubber-band back when it was a folder—deleting the folder didn't erase any of the history. This can sometimes be a little confusing—since the rubber-band "child" repository has a copied-and-modified version of those old slingshot commits, it can sometimes feel like you're having déja vu.

Unfortunately, any collaborator who pulls slingshot at this point will have an empty rubber-band folder. You might want to remind your collaborators to run this command to ensure they have all the submodule's content:

git submodule update --init --recursive

You'll also want to add the rubber-band submodule to magic roll-back can. Luckily, all you need to do that is to follow the same procedure you used earlier when you added rock to slingshot, in "Adding a submodule."

cd ~/projects/roll-back-can
git submodule add https://github.com/<user>/rubber-band rubber-band
git commit -m "rubber-band submodule"
git submodule update --init --recursive

Advice on using submodules (or not)

  • Before you add a repository as a submodule, first check to see if you have a better alternative available. Git submodules work well enough for simple cases, but these days there are often better tools available for managing dependencies than what Git submodules can offer. Modern languages like Go have friendly, Git-aware dependency management systems built-in from the start. Others, like Ruby's rubygems, Node.js' npm, or Cocoa's CocoaPods and Carthage, have been added by the programming community. Even front-end developers have tools like Bower to manage libraries and frameworks for client-side JavaScript and CSS.
  • Remember that Git doesn't download submodule contents by default. If you're adding a submodule to an existing project, make sure anyone that works on the project knows they need to run commands like git submodule update and git clone --recursive to ensure they get everything—this includes any automated deployment or testing service that might be involved in the project! We recommend you use something like our "Scripts to Rule Them All" to ensure that all collaborators and services have access to the same repository content everywhere.
  • Submodules require you to carefully balance consistency and convenience. The setup used here strongly prefers consistency, at the cost of a little convenience. It's generally best to have a project's submodules locked to a specific SHA, so all collaborators receive the same content. But this setup also makes it difficult for developers in the "parent" repository to contribute changes back to the submodule repository.
  • Remember that collaborators won't automatically see updates to submodules—if you update a submodule, you may need to remind your colleagues to run git submodule update or they will likely see odd behavior.
  • Managing dynamic, rapidly evolving or heavily co-dependent repositories with submodules can quickly become frustrating. This post was focused on simple, relatively static parent-child repository relationships. A future follow-up post will detail some strategies to help manage more complex submodule workflows.

Further reading

New Year, new Git release

If your New Year's resolution was to update to a new version of Git, we've got good news. The Git community has just released Git 2.7.0, and we'd like to share some of its highlights with you.

More flexible naming for git bisect

git bisect is an awesomely powerful tool for figuring out how a bug got into your project. Just in case you're unfamiliar with it, we'll take this opportunity to give you a short introduction. If you already know about git bisect, feel free to skip the following section.

Review of git bisect

Suppose you get a bug report: "The hyperdrive is running backwards!" Sure enough, in the current master branch, the hyperdrive is running backwards:

$ git checkout master
$ ./test_hyperdrive
FAILURE: destination is getting farther away

"That's funny," you think to yourself, "I know it worked in version 4.2." You double-check:

$ git checkout v4.2
$ ./test_hyperdrive
SUCCESS!

The question is, how did it break? Some change between version 4.2 and master must have introduced a bug.

At this point you could open your debugger or start adding print statements to the hyperdrive module. But that's a lot of work. Luckily, there's an easier way to discover where the bug was introduced: git bisect.

You start by telling git bisect a good and a bad version:

$ git bisect start
$ git bisect good v4.2
$ git bisect bad master
Bisecting: 2 revisions left to test after this (roughly 1 step)
[8cc2d9b4f02ccc208bd9f6d6b01ac6ed57fbb606] Take advantage of available wormholes

As soon as you do so, git bisect chooses a revision roughly midway between the known-good and the known-bad revisions. Your job is to test this version then tell Git the result of your test:

$ ./test_hyperdrive
SUCCESS!
$ git bisect good
Bisecting: 0 revisions left to test after this (roughly 1 step)
[f97f670fb5303ea0097e4475ec8fcf3e2c7dde85] Hyperdrive: bypass the compressor

You continue like this, each time halving the gap between the newest known-good and the oldest known-bad revisions:

$ ./test_hyperdrive
SUCCESS!
$ git bisect good
Bisecting: 0 revisions left to test after this (roughly 0 steps)
[e0cbfe825a0285e58c59cefb9b78abff2ae0c369] Implement hyperdrive parity inverter
$ ./test_hyperdrive
FAILURE: destination is getting farther away
$ git bisect bad
e0cbfe825a0285e58c59cefb9b78abff2ae0c369 is the first bad commit
commit e0cbfe825a0285e58c59cefb9b78abff2ae0c369
Author: Some Developer <me@example.com>
Date:   Thu Dec 31 14:05:09 2015 +0100

    Implement hyperdrive parity inverter

:100644 100644 a9562e3d7cea826ed52072e9b104bc9f7e870cf9 da2bc4f6d15943dcf4872641fae08d79d7696512 A  hyperdrive/parity.c

Congratulations! You now know that commit e0cbfe8 introduced the bug. Often, viewing the changes made by that commit makes it obvious what the mistake was and how to fix it. If not, at least you've dramatically narrowed down the amount of code that you have to debug.

When you're done, type git bisect reset to end the bisection session.

git bisect: not just for regressions anymore

Although git bisect is most often used to find software regressions, it should be clear that the same approach can find any change that was introduced into the software; for example,

  • When did a certain feature slow down?
  • When did the size of the images directory grow beyond 5 MB?
  • When was a particular bug fixed?

git bisect could always locate such changes. But regardless of what kind of change you were looking for, you always had to type good to mark revisions before the change and bad to mark revisions after the change. This could be very confusing, especially if you wanted to find the commit that fixed a bug1.

To better support such uses, git bisect now allows you to use different terms in place of good and bad. With no extra setup, you can now use the more neutral terms old and new to represent "the old state of affairs" and "the new state of affairs":

$ git bisect start
$ git bisect old v4.2
$ git bisect new master

You can even invent your own terms. Just specify them when you start the bisection:

$ git bisect start --term-old yucky --term-new yummy
$ git bisect yucky v4.2
$ git bisect yummy master

[source]

New configuration setting for --recurse-submodules

If you use Git submodules, you have probably made the mistake of pushing changes to your main module without first pushing the corresponding changes that you made in your submodules. What you should have done, of course, is use the --recurse-submodules option; for example,

$ git push --recurse-submodules=on-demand origin

Now there is a new configuration option that you can use to save the extra typing (and the embarrassment of pushing incomplete work):

$ git config push.recurseSubmodules on-demand

If you'd rather have Git just warn you about potential problems, then use

$ git config push.recurseSubmodules check

You can override this configuration setting by typing --no-recurse-submodules on the command line. [source]

Continued worktree improvements

Do you remember the git worktree command that was introduced in Git 2.5.0? It allows you to create multiple working copies that are connected to a single local Git repository.

In Git 2.7.0, git worktree continues to get better:

  • With the new git worktree list command, you can list the worktrees linked to the current repository and the branch checked out in each one. [source]
  • git bisect can now run in any worktree, or even in two worktrees simultaneously. [source]
  • You can now clone from a linked worktree. [source]
  • Submodules support for worktrees is improving. [source]

Git LFS support for git p4

git p4 is a bridge between Git and Perforce. It can fetch commits from Perforce into Git, and push commits from Git to a Perforce server. It allows you to use Git locally, even if you ultimately have to push your changes to a Perforce server. (There are similar tools to bridge between Git and Subversion, Mercurial, Bazaar, TFS, and others.)

git p4 now has support for storing large files in Git LFS ("Git Large File Storage"). This allows you to store large files from Perforce (e.g., media files) outside of your Git repository to avoid bloating the repository on disk. (Note that this feature doesn't yet support git p4 submit.) [source]

More uniform commands for listing references

Git has three main ways to list references: git branch, for listing branches; git tag, for listing tags; and git for-each-ref, for listing references of any kind. But these commands, despite their overlapping functionality, had differing capabilities and options.

Now, thanks to the work of Google Summer of Code student Karthik Nayak, these commands now have a more uniform interface, and have also gained some features along the way. Now all three commands support the following options:

  • --points-at <object>: list any references that point at the specified object
  • --merged [<commit>]: only list references that have been merged into commit (HEAD by default) :
  • --no-merged [<commit>]: only list references that have not been merged into commit (HEAD by default) :
  • --contains [<commit>]: only list references that contain the specified commit (HEAD by default)

They have also gained new formatting and sorting options. [source] [source]

Other changes

  • git stash show now supports two configuration settings, stash.showPatch and stash.showDiff, that select how it should display stash entries by default. [source]

  • git blame now works correctly with the --first-parent option, and also when --reverse and --first-parent are used together. [source] [source]

  • The appearance of gitk on high-DPI monitors has been improved. [source]

  • Security fixes:

    • Avoid integer overflow when computing diffs. [source]
    • Limit submodule recursive fetches to safe protocols. [source]

    We recommend that everybody upgrade to a version of Git with these fixes, namely Git 2.3.10+, 2.4.10+, 2.5.4+, 2.6.1+, or of course 2.7.0+.

The rest of the iceberg

As usual, if you would like to know more details about what is new in Git 2.7.0, please refer to the full release notes.

This Git release has more than 800 commits from 81 contributors. Here's to a great 2015 and an even better 2016!


[1] It might seem that git bisect shouldn't care whether the change you are looking for was from bad to good or from good to bad. But in fact, if the first two commits that you mark are not direct ancestor/descendant of each other, git bisect has to examine some common ancestors of those commits. In that case, the logic is different depending on the direction of the transaction that you are looking for.

How the Services team uses GitHub

If you're writing code, a repository is an obvious place to manage your work. But what about when the team's primary deliverable is not software? At GitHub, the Professional Services team helps customers get set up with GitHub Enterprise and trains people how to use Git and GitHub. We use GitHub extensively to efficiently and transparently communicate, schedule and prioritize. We hope how we use GitHub will help your team use the platform for more than just code.

Services team repository as our main interface for interaction

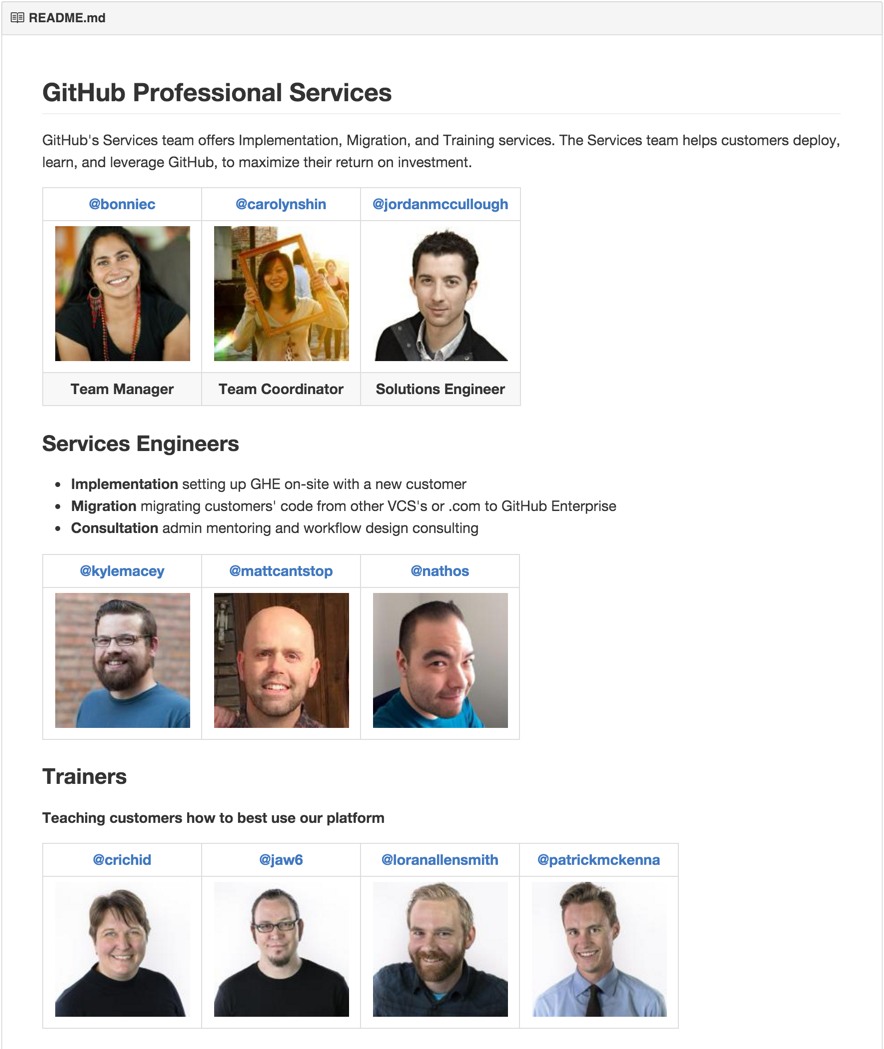
Most teams at GitHub have a team repository with a README.md file that introduces the team and explains the team's main responsibilities. Our Services team's repository shows our offerings and introduces the members of our team.

image

Our README provides a clear path forward for teams who want to utilize our services by listing our offerings and showing who to reach out to if help is needed. We provide specific team handles for people to mention us with GitHub's @mention feature. By mentioning a specific team they can reach the subset of the team they need.

team-mentions

This way, different team members can respond to their respective team handles. Some teams at GitHub rotate who is responsible for checking their team's mentions on a weekly basis. This lets some team members have stretches without distraction while the team is still responsive to GitHubbers outside of their team. We have streamlined many processes to utilize @mentions with GitHub's notifications instead of relying solely on email correspondence.

In our README, we also have linked Markdown files that document our services. We have files that document how we work, including everything from checklist-formatted Markdown files for onboarding new team members to guides on how to configure LDAP for our customers on GitHub Enterprise. Our team repository provides ample information for people to do their jobs.

Coordinating customer engagements

GitHub Issues, Pull Requests and Notifications are at the heart of coordinating, delivering, and reviewing the Services team's engagements with customers. We use a link that has our engagement Issue template as the body parameter of the URL. This creates a checklist as the top comment of a newly created issue. We coordinate with Sales, Finance, and Legal by opening issues in their team's respective repositories.

Once an engagement is set and ready to be delivered we open a Pull Request to track delivery tasks and notes. We create a file called retrospective.md in a /engagements folder in the repository to open the Pull Request. We then use the top comment of our Pull Request to track any bugs, follow-up tasks for after the engagement, and leave notes for sales to take over. We add comments to the Pull Request for each day's notes to keep everyone on the team in the loop.

When we complete the engagement we write our retrospective. Many different teams at GitHub know about this folder and check in on customer feedback by visiting this /engagements folder and reviewing the retrospective files. We use Pull Request comments to add final details like our expenses and mention the teams needed to close out any outstanding tasks. The process lets us have a great historical document of our conversations instead of the details getting lost in people's email.

Team decisions and transparency

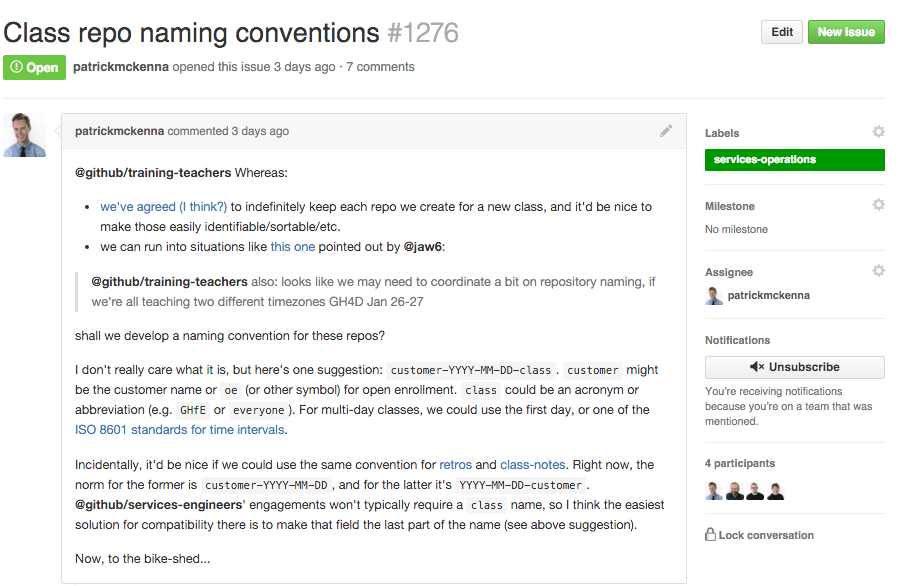
On the GitHub Professional Services team, we try to ensure the decision-making process and our team's initiatives are as collaborative and transparent as possible. We open an issue to discuss any topic that needs our attention. We try to default to having conversations in the open and with a URL.

Transparent conversation is especially necessary as a geographically-distributed team. This pattern permits others who are on Services engagements to get context when they finish their engagements and catch up on their notifications. It also lets people understand the why of a decision even years after the decision occurred.

discuss-topics

We often have lengthy discussions about which path to chose, and because we're a diverse team, we hear many different approaches. Our internal focus is to get to a point where we can move forward with an option to test, and refine the path forward as we get more information about what works best.

Weekly radar meetings (standup)

Each Monday, we create an issue that we use as our standup meeting. We add our availability for the week and the main items we will be focusing on. We get together for a 30-minute video chat session to collaborate on the week's activities and to spend some face-to-face time together. People add updates to their activities throughout the week in the radar issue. This helps us stay connected as a distributed team.

image

How we use pull requests for non-code related changes

The Services team's uses of Pull Requests are varied. We tend to think of a pull request as shipping some change or accomplishment into our organization. We open pull requests to change our README, to track an engagement we are on and to propose future plans for the team. The pull request process enables us to get feedback from our team members while also tracking our major accomplishments. We use GitHub's checklist feature to track outstanding tasks for any deliverable (including this blog post).

Pull requests do a great job of showing how a document evolved as well as making that evolution a collaborative process. By editing files in a pull request, we can see how our thinking has changed over time or how our organization has grown. I attended a great session at OSCON Amsterdam about how New Relic uses Pull Requests for non-code deliverables as varied as discussing company policy changes to documenting infrastructure. Many of the companies that use GitHub discover how the simple @mention and notification tools can transform workflows and company culture.

Collaboration is at the heart of GitHub

At the heart of GitHub is a toolset that empowers developers through tracking change and enabling collaboration. The Services team at GitHub uses these tools as an integral part of their work to help move the company forward. How does GitHub help your team be more collaborative and productive?

The Services team is hiring for multiple positions. Check out the job board and see how you can help us enable companies to create great things with GitHub. If your team needs help getting the most out of GitHub you can visit our website to see our offerings.

Learn Ruby programming with GitHub and Udacity

We love the Ruby programming language for its natural, human-focused design philosophy and think you will too. That's why we teamed up with Udacity to bring you three new Ruby Nanodegrees, starting with Beginning Ruby.

Udacity Beginning Ruby Nanodegree

Beginning Ruby is open for enrollment now, with Ruby on Rails and Senior Ruby on Rails becoming available in 2016.

In each of the Nanodegree programs you will learn from Udacity's expert instructors, with supplemental interviews and content from GitHub Ruby instructors Jesse Toth and John Britton.

With a commitment of 10-15 hours per week, students complete a Nanodegree in an average of 4-9 months, at a cost of $200 per month with 50% returned upon graduation in some cases.

Partnering with Udacity to create the Ruby Nanodegree series is a step to help close the talent gap and empower aspiring developers to gain new skills.

Doubling Down on ConnectHome

b3344c2a-6c44-11e5-9c85-3c25fdda436c Today GitHub is proud to host the Secretary of Housing and Urban Development, Julián Castro, at our SF office. We are thrilled to welcome him, his senior staff, community organizations, tech company workers, and representatives from EveryoneOn, the national non-profit leader of ConnectHome.

ConnectHome stands alone as the first project of its kind. A public-private sector partnership, ConnectHome will initially connect more than 102,000 low-income households – and nearly 200,000 children – living in public housing with high speed broadband wireless Internet and tech tools for digital innovation.

As Chike Aguh from EveryoneOn stated at GitHub Universe, “Talent is universal, but opportunity is not.”

Growing up, many of us working in tech had a home Internet connection and a computer which jump-started our ability to be part of this sector: Currently, 1 in 4 US households do not have a home internet connection. This digital divide primarily affects low-income residents of color and has devastating effects on education and job attainment. Bridging the digital divide is a necessary ingredient to break generational cycles of poverty. GitHub understands this and we’re proud to be in on the ground floor of ConnectHome.

An investment in ConnectHome is an investment in the future of innovation. We will all reap the benefits of a country where everyone is connected and one in which those most impacted by systemic inequity will be the engineers, creators, leaders, and innovators of the tech sector. We fully expect to hire from this talent pool, and are ready and excited to support the genius on the ground.

Today we are proud to announce that we are doubling down on our financial commitment to ConnectHome - now $500,000 - along with $3 million in product and thousands of hours of staff time to help make this a reality. But we need your help: Join us in being part of this historic initiative.

Donate to the individual giving campaign to help every ConnectHome household with children get a device. Spread the word through your networks.

Today GitHub’s CEO, Chris Wanstrath, is issuing a challenge to our friends in the tech sector: Join us in putting dollars behind this momentous project. Contact us (ConnectHome@github.com) to become a company sponsor of ConnectHome.

Get involved in Hour of Code and Computer Science Education Week

Every year during Computer Science Education Week, we have the opportunity to give back for an hour to teach students how to code. We're following the example of Code.org, whose initiative is to break down the stereotype that only a certain kind of person can program. Collectively our goal is to deconstruct the barrier of "can't" and turn it into "can."

This global movement is introducing computer science across the globe, reaching tens of millions of students in more than 180 countries with a simple a challenge: code for just one hour.

Tutorial Announcements

Every year Hour of Code works with top developers and industry leaders to create fun programming tutorials for students with the hope that they will be inspired to keep learning. The videos introducing these tutorials made us excited about volunteering, so maybe they will motivate you too. Check them out:

Star Wars producer Kathleen Kennedy discusses how to use code to make BB-8 come to life. Watch what else Kathleen has to say about the Star Wars tutorial.

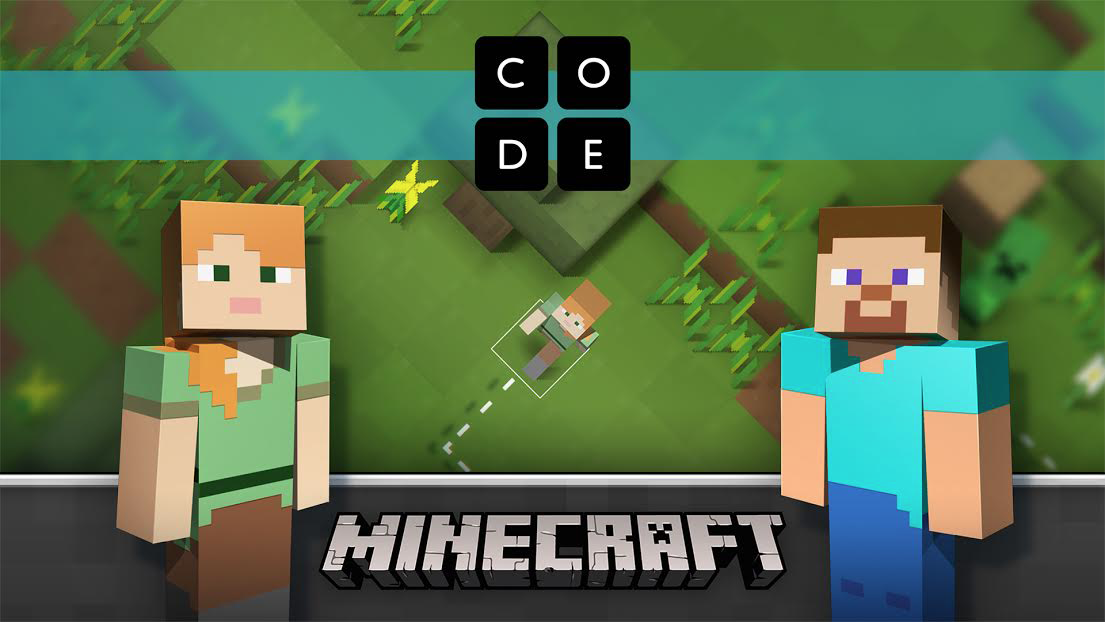
Are you or your kids Minecraft fans? Take a look at the introduction to the Minecraft Hour of Code tutorial featuring Mojang's Lead Developer, @jebox.

screen shot 2015-12-03 at 8 17 16 am

How to Volunteer for Hour of Code

You can get involved by donating an hour of your time to a classroom in your area. This donation can be your physical presence or a video chat with one of many classes around the world. More information can be found in the How-to-Guide for volunteers.

If you're unable to participate in Hour of Code, consider other opportunities to give back during Computer Science Education Week, December 7-13. You can advocate for computer science in the classroom or help your own kids walk through the tutorials.

Continuing the Movement after Computer Science Education Week

We're hosting another workshop on December 12th from 9:00am-4:00pm, teaching K-5 educators how to encourage kids to code. Additional details are available on the workshop page.

Apple open-sources Swift on GitHub

Swift is open-source

Swift, Apple's powerful new programming language, is now open source on GitHub. Developers can submit bug fixes and enhancements, and help bring the language to new platforms.

Open Source has been an important part of Apple's platform for a long time. The iOS and OS X operating systems are powered by the Darwin kernel and hundreds of UNIX utilities. Apple has also played a vital role in advancing open web standards with WebKit, made significant contributions to the LLVM compiler infrastructure, and released ResearchKit earlier this year.

We warmly welcome Swift to GitHub and can't wait to see what you build with it. Check out the showcase of projects built with Swift, and head over to the Swift repository to find out how you can get involved.

Atom mug and annual Monday sale

Let everyone around you know that your daily 1,3,7-Trimethylpurine-2,6-dione (C8H10N4O2) / 3,5 Dicaffeoylquinic acid (C25H24O12) fix just might be radioactive with this new Atom mug. Only you will know the truth.

Stay positively charged in the GitHub Shop. Note that this mug color and style is limited edition. When they're gone, they're gone.

Atom Mug

This Cyber Monday (November 30th), take advantage of free shipping on orders over $30 and use the code OCTOCYBER2015 to take 30% off the new Atom Mug, Octocat Figurine, and the rest of the GitHub Shop.

Don’t forget, the last day to order for delivery by Christmas for international shipping using Priority Mail International shipping rate is December 8th and domestic shipping is December 18th.

Something went wrong with that request. Please try again.