Author Archives: Alan

About Alan

I've spent some time working in the games industry, and now I'm currently coming to the end of a PhD in Robotics at the Bristol Robotics Laboratory. Dawn Robotics is an attempt at supporting myself doing something I love, and also a platform that I can hopefully use to turn my various ideas for robots, and robotic parts, into useful products.

New Software For Our Raspberry Pi Camera Robot

We had a great response to a recent blog post we wrote, describing how to build a Raspberry Pi robot that you can drive around using a tablet, smartphone or PC. Therefore we’ve carried on developing the software for it, and are pleased to announce the update today. The changes that we’ve made to the software have largely been to support cool things that we want to do with the robot in the future, but features that users of the robot will notice are

  • much faster camera streaming. Initially the camera was streaming images at about 4-5 frames per second using raspistill and mjpg-streamer, but we’ve now written our own camera streamer, and got it streaming at 15fps which is much smoother, and makes driving the robot around a lot easier.
  • support for more WiFi dongles when working as an access point. Our previous software release mainly worked with WiFi dongles that used the same chipset as the Edimax EW-7811Un (the hostapd rtl871xdrv driver). It was possible to get it to work with other WiFi dongles that used the hostapd nl80211 driver, but it required a fairly technical user. Now our software should work with a much wider range of WiFi dongles with no change required.
  • we’ve added a shutdown button. Previously the robot was turned off by just cutting off the power. This was very unlikely to corrupt the SD card as nothing was written to it, but a lot of users felt uncomfortable with not doing a proper shutdown. Now a shutdown button in the web interface provides peace of mind.
  • more configuration options. The configuration webpage of the robot has been expanded to offer more options to control the movement of the robot.

As before, there are multiple options for getting hold of this software. If you already have an SD card then you can download an SD card image with all of the software installed here (go for the most recent version). Update: If you use our SD card image, please remember to expand it after installation by running

sudo raspi-config

and choose the ‘Expand Filesystem’ option.

Alternatively, we sell SD cards with the image preloaded in our store. Finally, for those who want to set up the software from scratch, or who want to modify it for their own robotic projects, we give full details for building the SD card, and installing all the software, here.

We believe that the Raspberry Pi is a great platform for robotics, and have got a number of tutorials for our Raspberry Pi Camera bot lined up for the coming months. If there’s anything in particular you’d like to see, please let us know.


 

Attending the Linux User Pi Jam

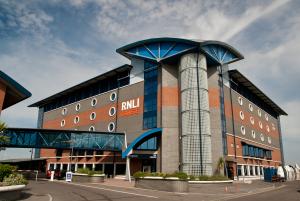
linux_user_jam33565-RNLI-CollegeLast Saturday we attended the Linux User Pi Jam, in Poole, and had an absolute blast. The Jam was held at the RNLI college, which is a great location for an event, and we met some very interesting people at the Jam.

We’re glad to see that robotics is rising in popularity as something to do with your Pi. :) We ran a store at the Jam, and other robotics vendors there included The Little British Robot Company and PiBorg (with their very cool DoodleBorg tank). Ben from Phenoptix was also there with a neat little laser cut robot arm. We saw some cool Raspberry Pi robot projects from Leo White, and had a nice chat with Ian Renton, the guy behind the Raspberry Pi tank.

In the afternoon we gave a talk on combining the power of Arduino with the Pi to build Raspberry Pi robots as we have with our Camera Bot. For anybody interested the slides can be found here.

Pi Jams are a great way to meet interesting people, and get ideas for your next Pi project, if you haven’t been to one yet then we recommend that you keep an eye out for one in your area and head along. :)

Building a Raspberry Pi Robot – CamJam Video and Slides

A couple of months ago, Dawn Robotics went to the fantastic Cambridge Pi Jam organised by Michael Horne and Tim Richardson. Whilst there, I gave a talk on building a mobile robot with the Raspberry Pi (such as the camera robot we talk about in this blog post). The talk was aimed at quite a high level, and looked at 7 key areas you should think about when building a mobile robot.

Well, I recently found out that there was a video of the talk online (along with videos of all the other talks at the Jam). Therefore I thought that I’d link to it here, along with the slides for the talk. The sound quality is not too great, and I need to work on my presenting style, but hopefully it’ll be useful to people thinking of building their own robot. If you’ve got any questions, or would like more information on any of the areas talked about in the video, please post on our forums.

Also, for those that are in the area, we’ll also be giving a talk at the Linux User Raspberry Pi Jam being held in Poole this Saturday (5th April 2014). A small number of tickets for the Jam are still available here. This talk will mainly be about using the Pi with an Arduino, but we’ll still try to squeeze in some robots. :)

Using the Pi Co-op as a General Purpose I/O Board for the Raspberry Pi

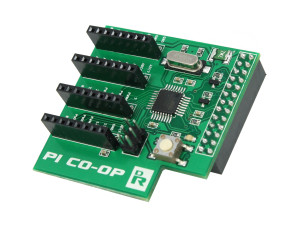
We released the Pi pi_co-opCo-op, an Arduino add-on board for the Raspberry Pi back in the middle of January. But for various reasons, we haven’t had the time to do much promotional work, and explain to people why it’s so cool, and why you’d actually want to add an Arduino to your Pi.

To fix that, we’ve created a video, because reading text can be really boring :) , and then, we’ve written this blog post to show you one of the really useful things you can do with the Pi Co-op. We show you how you can use your Pi Co-op as a general purpose I/O board for the Pi.

So now, instead of having to buy loads of different add-on boards for your Pi, you can just buy the Pi Co-op here. :) You can use it as an Analog to Digital Converter (ADC), you can use it to connect to 5V devices, you can use it to generate PWM signals, and you can use it for I2C. To top it all off, you can also control all of this functionality from a high level language such as Python.

Continue reading

Using the Dagu Mini Driver to Build a Raspberry Pi Camera Robot

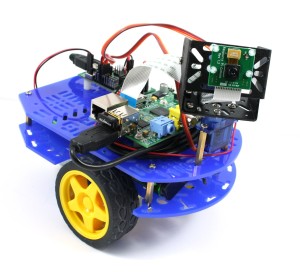
pi_magician_small_03__98633A Raspberry Pi with a camera, gives you a small, low cost, embedded vision system, but it’s not very mobile. In this tutorial we show you how to fix that by attaching it to a robot to give you a Raspberry Pi camera robot! The robot is WiFi enabled which means you can drive it around using a tablet, phone or computer, using the camera to explore remote areas.

We’ve tried to keep the components for this tutorial as affordable as possible, and as such we’re using the Dagu Arduino Mini Driver to control the motors and servos of the robot. This board also contains a 1A voltage regulator which we can use to power the Pi. Now a limit of 1A is a bit tight for the Pi, but we’ve found that with the right WiFi dongle, the Mini Driver voltage regulator can happily power itself, the Pi, a camera, and WiFi. All the ingredients you need for a camera robot. :)

Update: This robot also works with the Model B+ Pi, and the new Raspberry Pi 2. We’ve updated the instructions to reflect this below.

Update: We’ve now changed the robot slightly so that it uses a UBEC to power the Pi. This extends the battery life of the robot, and increases the current limit for the Pi to 3A.

Continue reading

Creating a Dawn Robotics SD Card

Update: This post is now out of date as we’ve released a new version of the software. You can find an updated version of the instructions here.

This post describes all the steps we go through to set up a Dawn Robotics SD Card. This SD card contains Raspbian with software installed on it to support a Raspberry Pi robot, and also to support the Pi Co-op Arduino add-on board we sell. If you want to get up and running quickly, then you can just download a complete version of the SD card image here, or alternatively buy a pre-installed SD card from us here. For people who want to build their SD card image from scratch however, or who want to customise it for their own Raspberry Pi robot, hopefully this set of notes will be a good guide to show you what we’ve done.

Continue reading

Building a Raspberry Pi Robot and Controlling it with Scratch – Part 3

Happy New Year everyone! Things have been a bit quiet on this blog due to the Christmas rush, and the fact that we’ve been spending time on product development (more on that in a future post). But here at last is the 3rd and final post in our series on the Raspberry Pi robot we used for a workshop at the now not so recent Digimakers event at @Bristol.

In part 1 we described the hardware of the robot, in part 2 we talked about the software that ran on the robot. In this post we’ll talk about about the the Scratch simulator which the workshop participants used to create their robot control programs, and our experience of running the workshop. Continue reading

New Products in Stock

L293D Motor Driver

L293D Motor Driver

We’re now stocking some Integrated Circuits (ICs) in our store for your robotics projects.

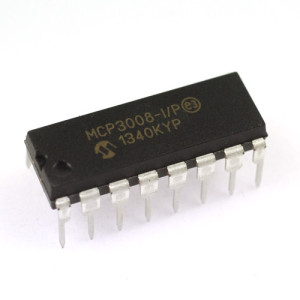
MCP3008 Analog to Digital Converter

MCP3008 Analog to Digital Converter

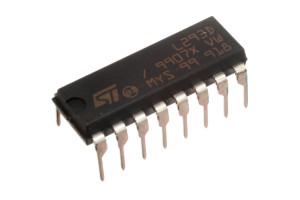
The L293D is a stalwart of many robotic projects. The are lots of newer motor drivers on the market, but the L293D’s DIP packaging and rugged design make it a great option for quickly breadboarding up some motor control for your project.

The MCP3008 is an 8 channel, 10bit Analog to Digital Converter (ADC) that is a very popular option for projects that need to monitor analog signals. The MCP3008 is an especially good match for the Raspberry Pi which doesn’t have an ADC built in, but which can talk to the MCP3008 using its SPI interface.

Building a Raspberry Pi Robot and Controlling it with Scratch – Part 2

Welcome to the second part of our series of posts, describing the workshop we ran at the recent Digimakers event at @Bristol. In the last post we described the outline of the workshop and looked at the hardware of the Raspberry Pi robot that we built for the event. In this post we describe the software running on the robot, and how we set it up. Hopefully this post will give some useful ideas for those wanting to set up their own Raspberry Pi robot.

Continue reading

Talking to a Bluetooth Serial Module with a Raspberry Pi

Bluetooth is a very low cost and flexible way to add wireless communication to your projects. However, it can also be a bit tricky to set up. In this post we show you how to set up a Raspberry Pi with a USB Bluetooth dongle so that it can communicate with an Arduino using a Bluetooth serial module.

Once the set up is complete, we’ll have a new serial port on the Raspberry Pi that can be used to communicate with the serial Bluetooth module, either using a program such as Cutecom, or using one of the many serial programming libraries such as pySerial. Continue reading